 Close Topic Options
 | Welcome Guest ( Log In | Register ) | Resend Validation Email |
DJ Panel ( Server Stats ) Song History Initial D World Chat Room (Discord) Broadband Stream RADIO BROADCAST » streaming at 96kbps with 3 unique listeners, playing Wain L - Make Up Your Mind Important Rules • Do not post any obscene material. (i.e. - nudity, explicit graphic situations ... etc.)
• Put a viewer discretion somewhere in your topic title / description when posting topic(s) that others might find offensive. (i.e. - Not Work Safe, PG13 ... etc.)
» FORUM MODERATOR : FORUM MODERATOR
• Put a viewer discretion somewhere in your topic title / description when posting topic(s) that others might find offensive. (i.e. - Not Work Safe, PG13 ... etc.)
» FORUM MODERATOR : FORUM MODERATOR
| |
Views: 5,287 · Replies: 5
Nerf Mods, You know you want to.| Tessou |  Posted: Apr 22 2012, 10:45 AM Posted: Apr 22 2012, 10:45 AM | ||
More NEGATIVE than a black hole Group: ADMINISTRATOR Posts: 19,345 Member No.: 12,263 Joined: Sep 12th 2005 Location: Update Profile | Hello IDW, Recently I saw some interest among members about modding cheap-yet-fun air powered Nerf guns. I won't say that I'm some sort of master of modifications, but I've had a fair amount of experience with the "craft". Unlike airsoft or other weaponized sports, Nerf has always been about being able to play indoors without worrying about breaking stuff. I'll be adding in advice and mod tutorials that speak to beginners. Some folks get confused about modding these guns, so I'm making it as easy to understand as possible. Let's start off with the most popular gun, the REV-6 Maverick. These are simple, reverse-plunger design pistols that retail for about $10 anywhere Nerf guns are sold. *What's reverse-plunger mean? Nerf guns use air power to send the darts flying, and that air comes from the plunger. A reverse plunger is made of two parts, and the rear assembly draws in air when the primer (in this case, the handle on the top of the gun) is pulled back. This portion of the plunger is held back by a catch mechanism that is actuated by the trigger. When the trigger pulls, the rear portion is released and slams into the front portion, launching a dart forward. Unfortunately, because it's two parts, there is no seal and thus air can escape as the rear portion moves forward. This means less power. Earlier today, I took a new Maverick and applied three quick mods to it that anybody can do with a basic toolset. For this application, I used my trusty Stanley 9-Way Screwdriver set and some household items. Specifically, I used: - Phillips #0 - Awl - Tack Puller - Serrated knife - Nail file (sandpaper will work just as well) - 4 pennies You will only need the screwdriver, knife, a few pennies and a wedge of some sort to complete this mod. The extra bits are just for polish and/or convenience. There are 11 screws keeping the Maverick together. Unscrew the first ten and pop off the priming handle on top to find the last screw hidden underneath. Taking all of these out will allow you to open the gun up completely. Here's the first mod, and it's super easy! Take 1-5 pennies and put them behind the spring, as demonstrated here: 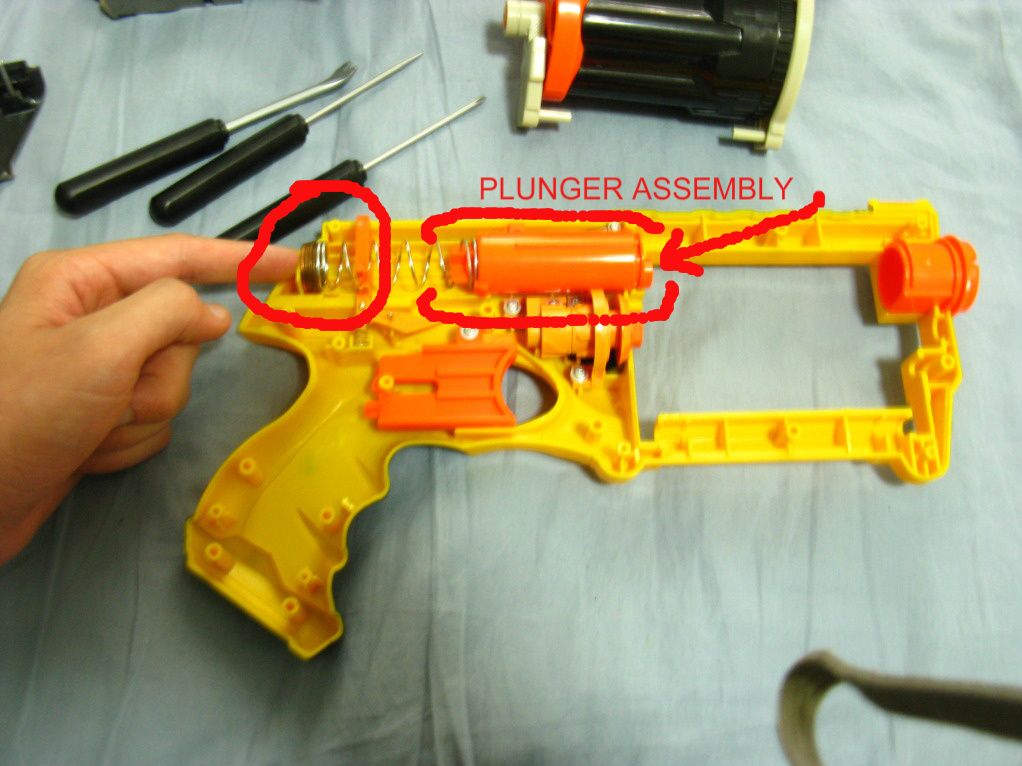 Image size reduced, original size: 1024 x 768. Click here to view the image in its original dimension. Do not put more than 5 pennies, or the priming handle won't be able to pull back enough for the plunger to catch (thus you won't be able to fire). This is known as the "penny mod" and it makes it so the spring compresses a bit more, giving you a boost in power. Let's make the barrel swing out completely now. Take serrated knife and cut off the tab on the front of the barrel assembly. You can see the remains of it on mine here. 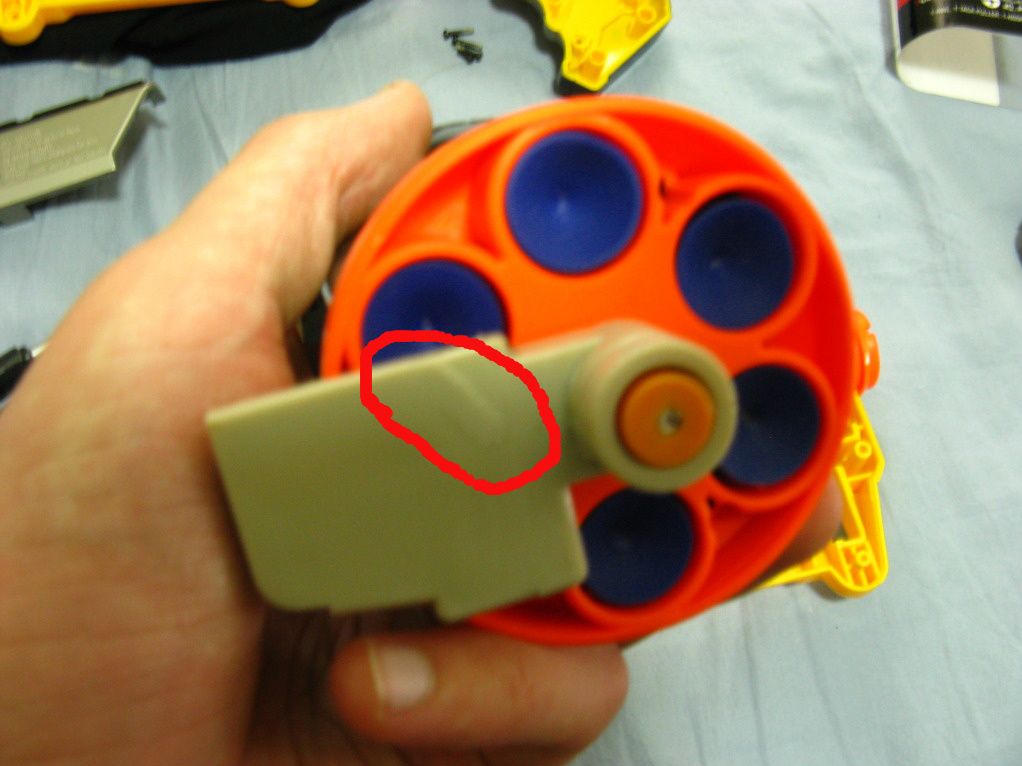 Image size reduced, original size: 1024 x 768. Click here to view the image in its original dimension. Try to cut it as flush as possible. Any little extra bits have a chance to catch on the gun. Now, flip the assembly over and find the corresponding piece of plastic on the other side. There are two little prongs on the right side of that piece. Cut them off as flush as possible. It should look like this now. 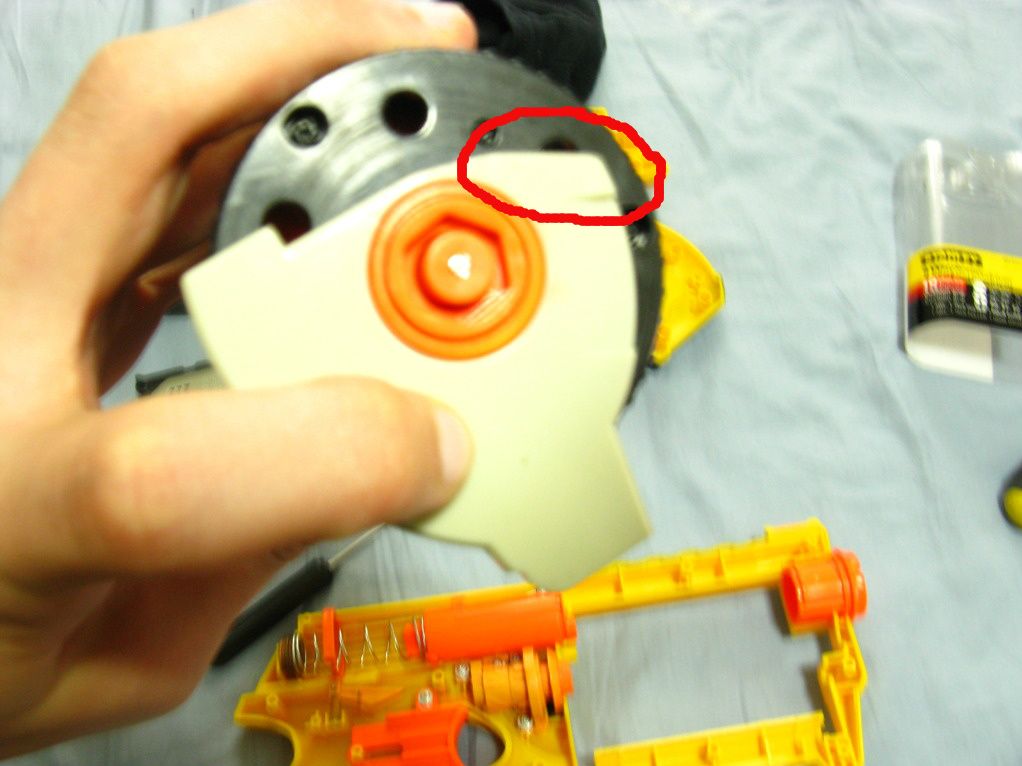 Image size reduced, original size: 1024 x 768. Click here to view the image in its original dimension. The barrel will swing out completely now. If you find it catching on the little tab on the gun assembly itself, file it down slightly and you should be fine. Lastly, we have the goddamn air restrictors. These little bastard parts are there to make sure the guns are as safe as humanly possible, which means most of the air gets vented instead of going to the darts. This is an easy fix that will take a bit more time than the other mods. Take the barrel assembly and put a wedge under one of the plastic pieces we just worked on. Pry the pin out so the top piece comes right off. Save the pin, the spring, and the end cap because you will need to put this back together. On the bottom of the barrel, which should still have a plastic piece attached and swinging freely, take out the three screws and pull the barrel apart. You will probably have a mess of little plastic parts scatter on the floor. Don't worry about this. The little three-prong pieces and springs can be thrown away. You just want the big orange caps with the long pins. Take a knife or scissors or bolt cutters, and snip off the pins. Put the orange discs back on their posts and put the barrel assembly back together. Slide the pin back in with the front piece attached, then hammer the cap back on. You can put the barrel back in place and put the gun together. This is how it should look without the restrictors. 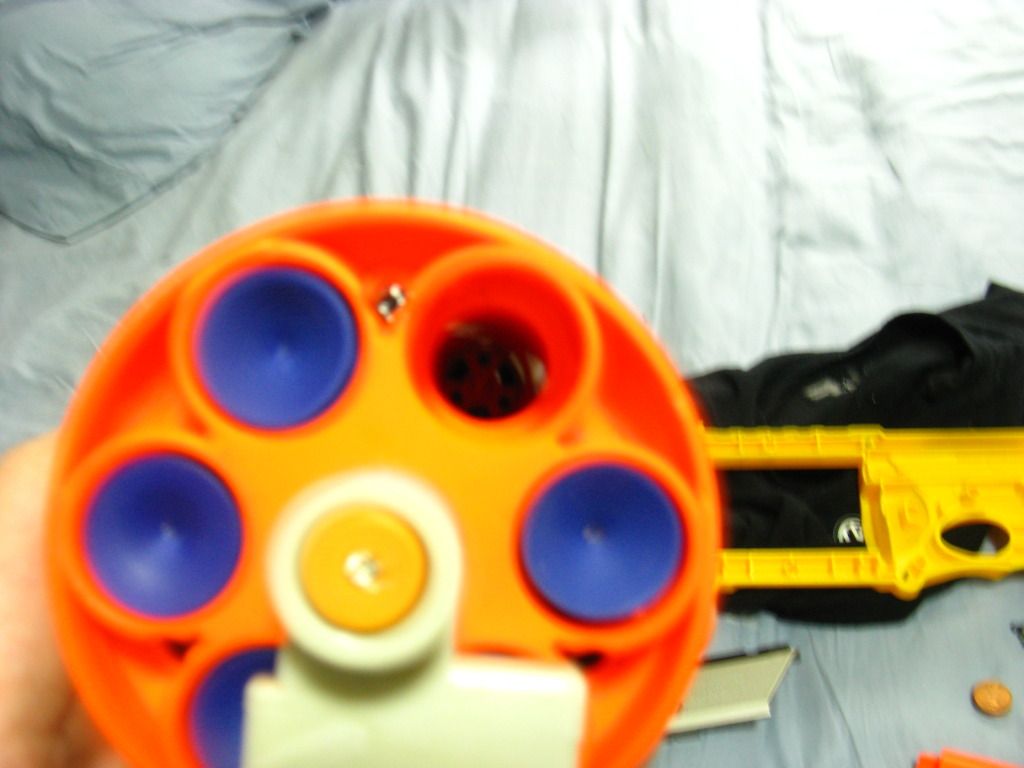 Image size reduced, original size: 1024 x 768. Click here to view the image in its original dimension. REMEMBER, the plunger is in two parts! The rear assembly attaches to the spring, and the front piece clips into the actual gun. If you don't connect the front part to the gun, the gun will not fire darts, because the spring will just pull back both parts and then slam the front piece into the barrel when you pull the trigger, venting the air inside the gun rather than into the barrel (and thus the darts). This will be very loud and annoying. Also remember to take the little spring on the top of the gun, and loop it into the post on the priming handle. Make sure this post is in front of the tab on top of the plunger so the handle will be able to pull the plunger back. Once you do that, you can put the other half of the gun on and secure the screws. Now you have a much more powerful Maverick. This set of mods takes about 30 minutes to complete.
| ||
Proud Contributor of IDW Forums and the Music Section Revival Project |
| Spaz | Posted: Apr 22 2012, 03:31 PM |
Just a guy towing a car across the country to chase a dream. Group: FORUM MODERATOR Posts: 9,272 Member No.: 30,193 Joined: Jul 25th 2008 Location: Plymouth, MN | I've got all of that stuff done on mine already, really makes a difference. |
Proud Contributor of Initial D World Forums |
| THE_HONDA_CG2 | Posted: Apr 22 2012, 09:58 PM |
Patient Zero  Group: Advanced Members Posts: 4,279 Member No.: 37,947 Joined: Oct 1st 2011 Location: Update Profile | Woah. This is some really intense stuff here Tessou. I have to try this out when I get my hands on my Maverick again. I hope you continue to put up more reviews and mods of different NERF guns. I think I just found myself a new hobby.  |
|
| icedagger | Posted: Apr 22 2012, 10:39 PM |
Slowpoke... Group: Advanced Members Posts: 2,605 Member No.: 18,773 Joined: Jul 5th 2006 Location: Philippines | Hmm... When I saw the title I thought you were going to strip the mod team of their powers or something.  |
|
| Tessou | Posted: Apr 23 2012, 02:36 AM |
More NEGATIVE than a black hole Group: ADMINISTRATOR Posts: 19,345 Member No.: 12,263 Joined: Sep 12th 2005 Location: Update Profile | I'll do a more proper video soon enough. The video only shows the results, not the actual modding, so I think it could have been better. I will buy another Maverick and do a video showing the actual modding so you have a better example of what to do. As for the topic title: well done.  |
Proud Contributor of IDW Forums and the Music Section Revival Project |
| Wanderer | Posted: Apr 29 2012, 06:40 PM |
The Watcher Group: Advanced Members Posts: 914 Member No.: 35,816 Joined: Jun 24th 2010 Location: San Jose, CA | |
|
| |
Powered by Invision Power Board 1.3.1 Final © 2003 IPS, Inc.