http://www.cameras.co.uk/reviews/panasonic-dmc-tz3.cfm
On to it - the DMC-TZ3 (Panasonic Lumix) is a pretty decent camera IMO. The zoom is good for a camera that size (and age), and one of the things that drew me to it is the fact that it has a Leica lens. That's probably a really shallow reason, but it was part of the selling point for me.
So I got me a camcorder as a gift - not a very good one (and is now not working properly) but a camcorder none-the-less, and decided to give my still camera to my younger brother. The second day after he got it he tells me it's not working.......Upset was not the word. I had this camera and it was doing FINE till I gave it to him. Anyways.
After a bit of checking I found that the problem is the CCD.
http://www.dalsa.com/corp/markets/ccd_vs_cmos.aspx
The very unfortunate part is that I couldn't seem to find the CCD anywhere online - maybe because I didn't have the right part number or something - but I couldn't find it.
Here's a sample of what the pictures were like before I changed the CCD.
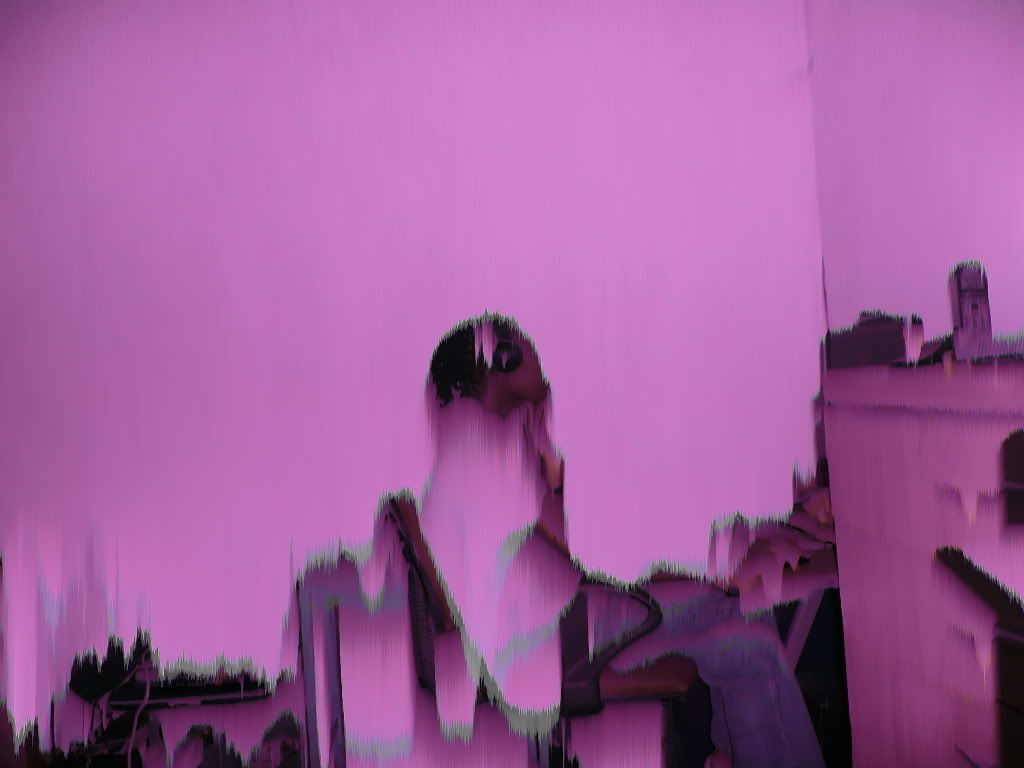
Image size reduced, original size: 1024 x 768. http://i162.photobucket.com/albums/t263/khat17/Camera-Lumix-Fix/P1030936.jpg to view the image in its original dimension.
So I also had done a video about the dis-assembly - but my video camera sux so don't complain much pls.
http://www.youtube.com/watch?v=HN96jQ1CZKU
So here are some pictures with the dis-assembly so you can follow. The general disclaimer (as usual) is don't complain about problems if you mess it up following this.
Firstly remove the screws.
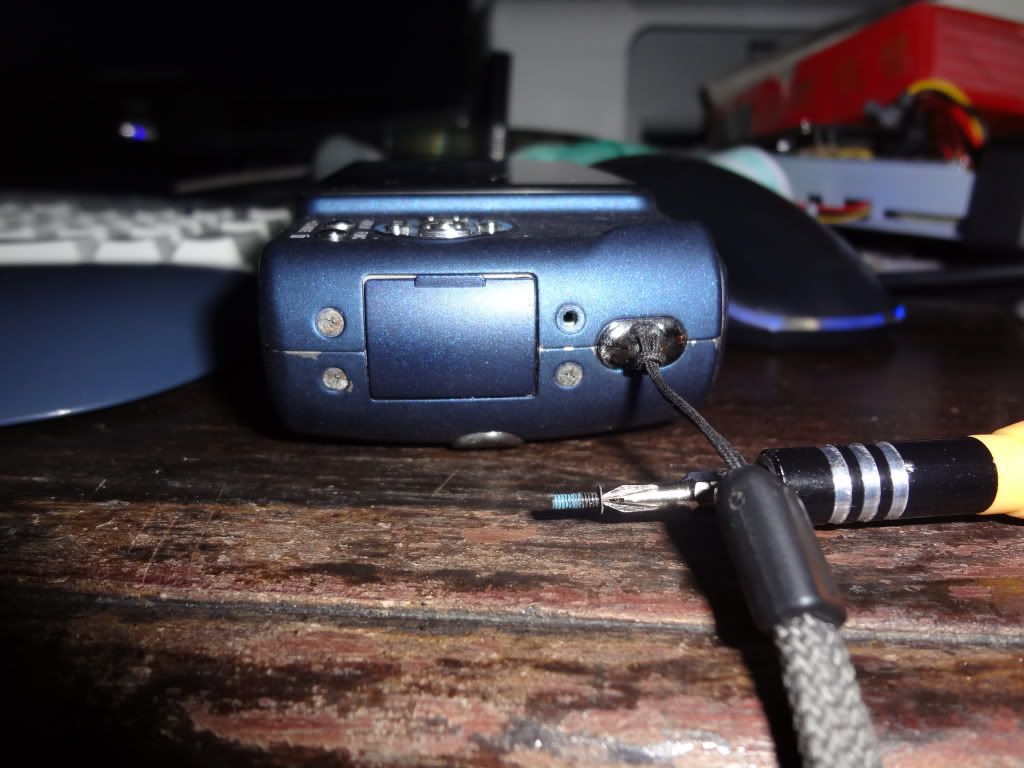
Image size reduced, original size: 1024 x 768. http://i162.photobucket.com/albums/t263/khat17/Camera-Lumix-Fix/DSC00380.jpg to view the image in its original dimension.
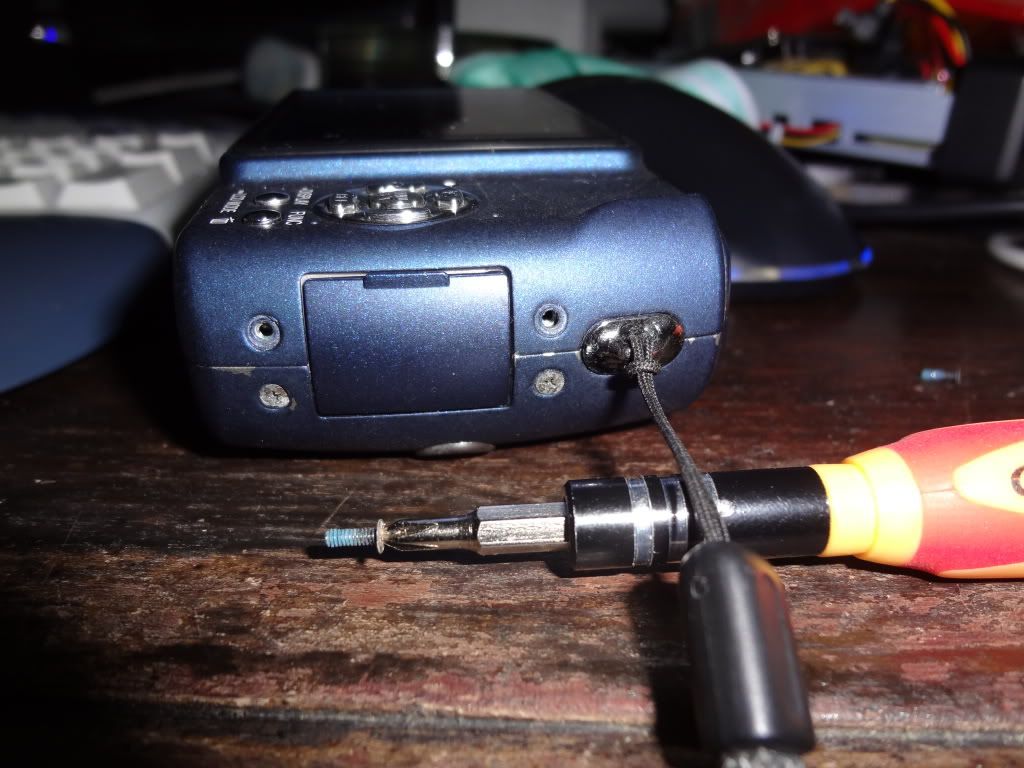
Image size reduced, original size: 1024 x 768. http://i162.photobucket.com/albums/t263/khat17/Camera-Lumix-Fix/DSC00381.jpg to view the image in its original dimension.
Please note that this screw is shorter than the others that we're going to remove.
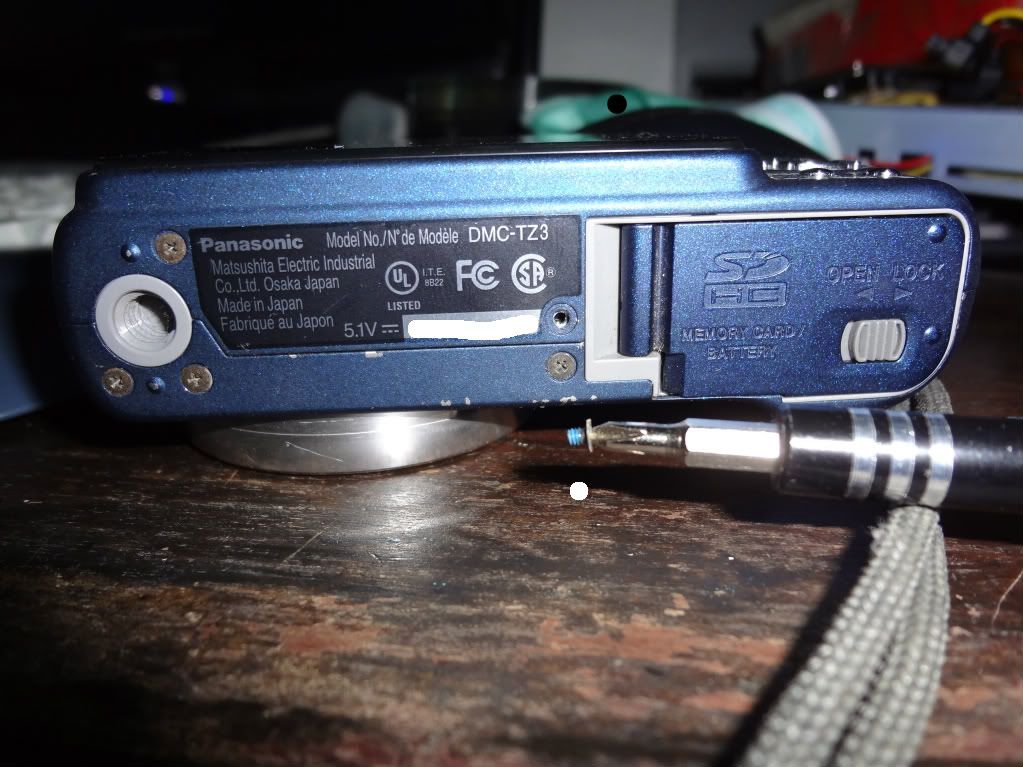
Image size reduced, original size: 1023 x 767. http://i162.photobucket.com/albums/t263/khat17/Camera-Lumix-Fix/DSC00382.jpg to view the image in its original dimension.

Image size reduced, original size: 1023 x 767. http://i162.photobucket.com/albums/t263/khat17/Camera-Lumix-Fix/DSC00383.jpg to view the image in its original dimension.
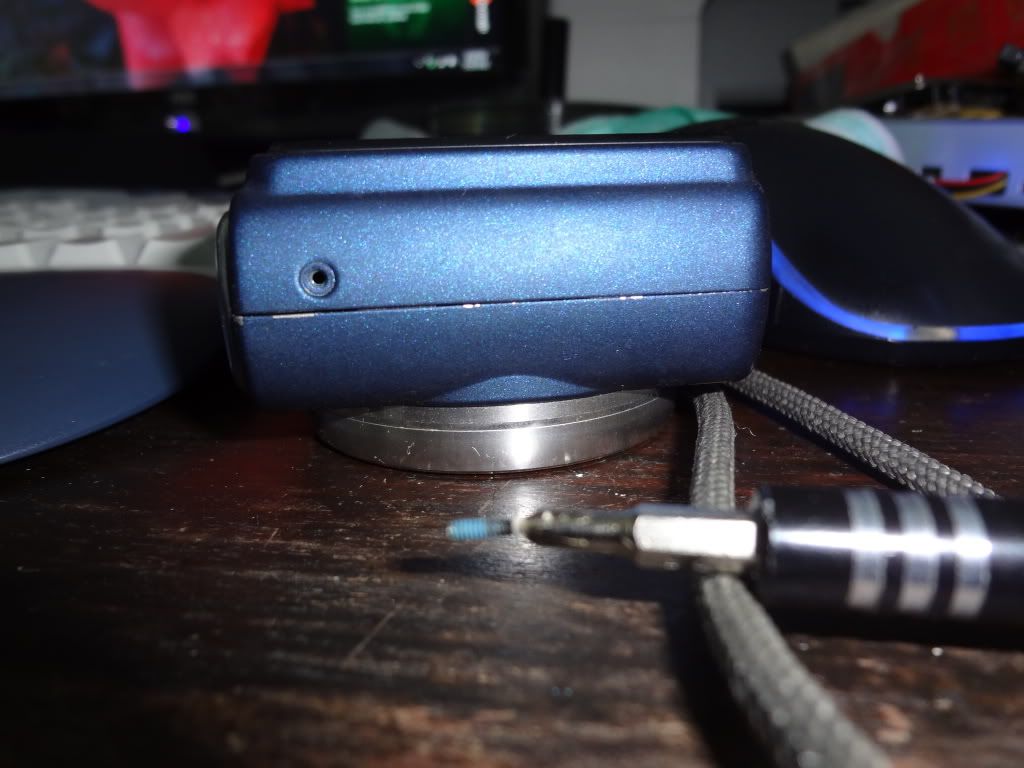
Image size reduced, original size: 1024 x 768. http://i162.photobucket.com/albums/t263/khat17/Camera-Lumix-Fix/DSC00384.jpg to view the image in its original dimension.
After removal, use a pry tool like the plastic ones used on cell-phones to open it up.
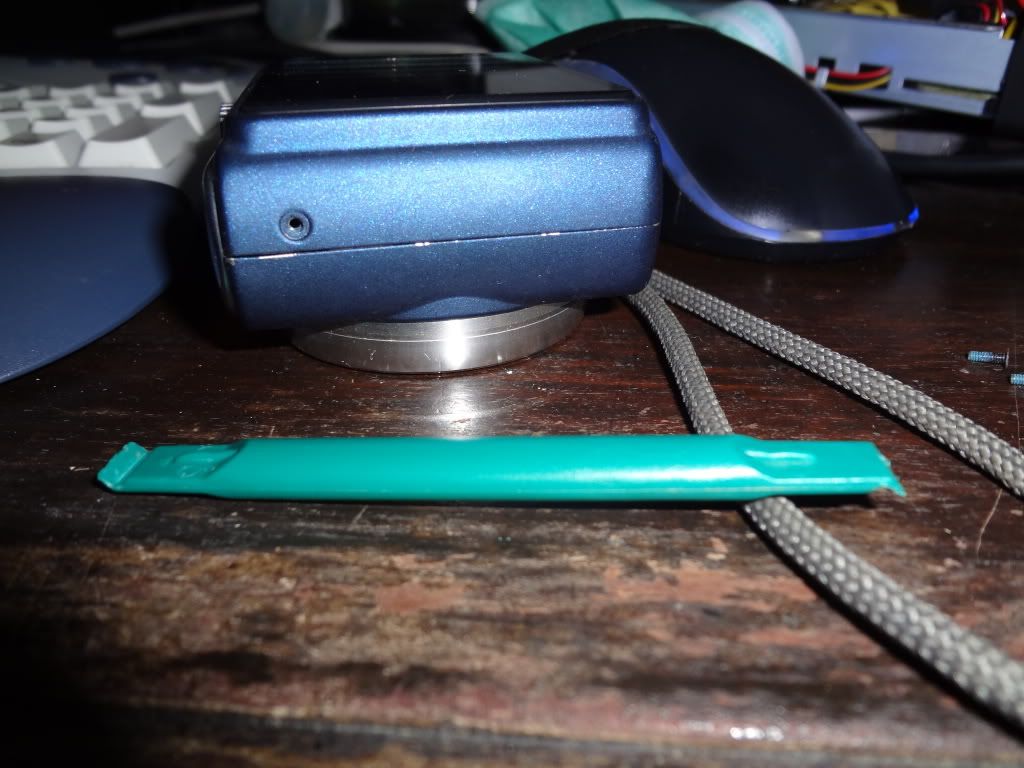
Image size reduced, original size: 1024 x 768. http://i162.photobucket.com/albums/t263/khat17/Camera-Lumix-Fix/DSC00387.jpg to view the image in its original dimension.
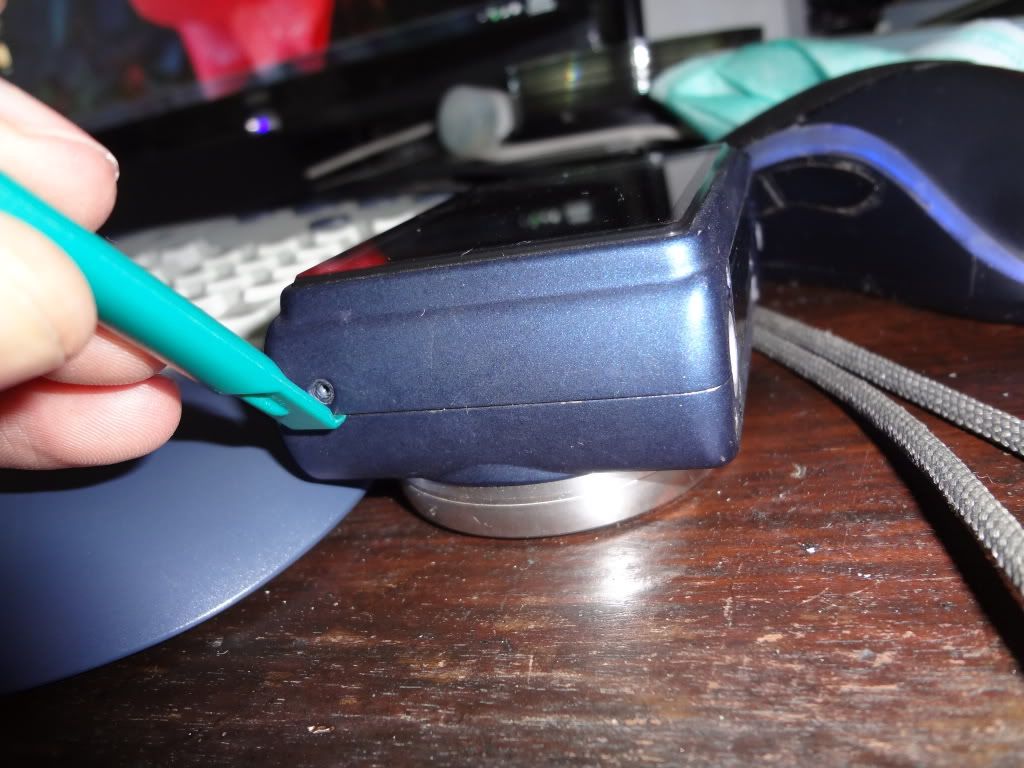
Image size reduced, original size: 1024 x 768. http://i162.photobucket.com/albums/t263/khat17/Camera-Lumix-Fix/DSC00388.jpg to view the image in its original dimension.
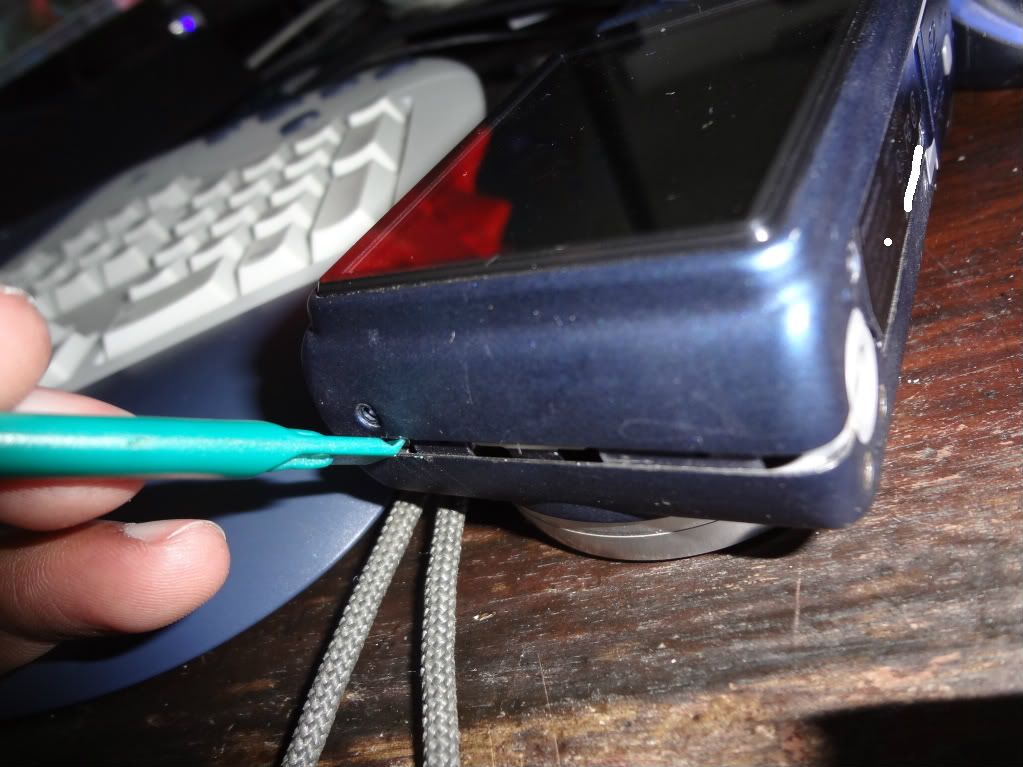
Image size reduced, original size: 1023 x 767. http://i162.photobucket.com/albums/t263/khat17/Camera-Lumix-Fix/DSC00389.jpg to view the image in its original dimension.
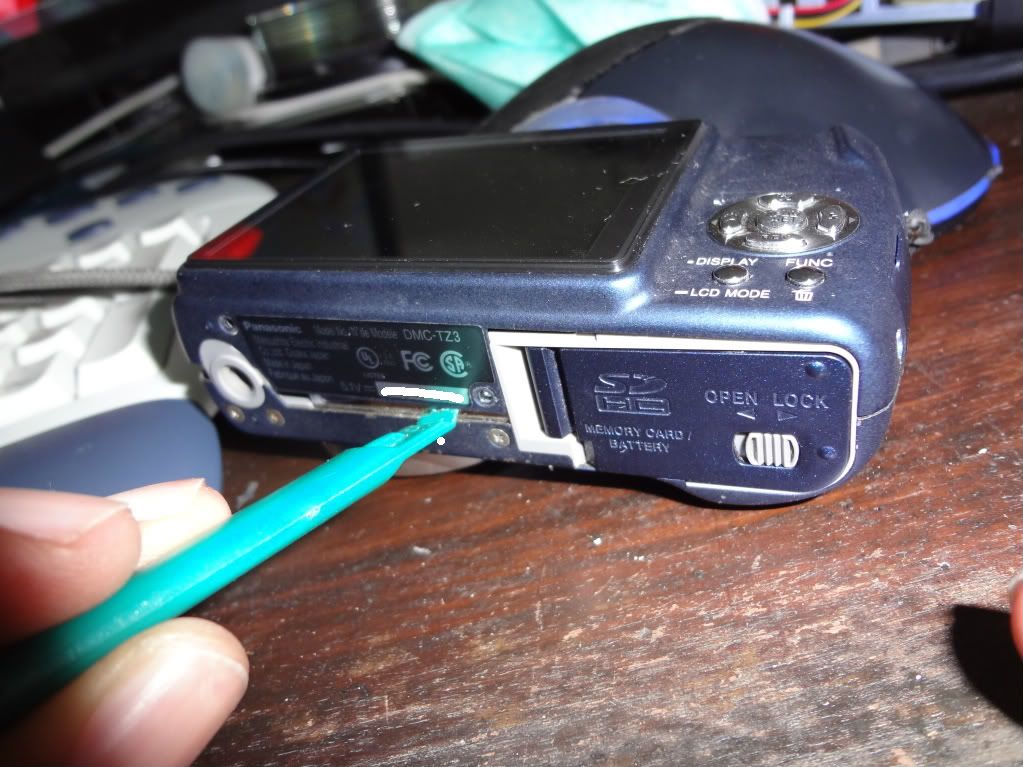
Image size reduced, original size: 1023 x 767. http://i162.photobucket.com/albums/t263/khat17/Camera-Lumix-Fix/DSC00390.jpg to view the image in its original dimension.
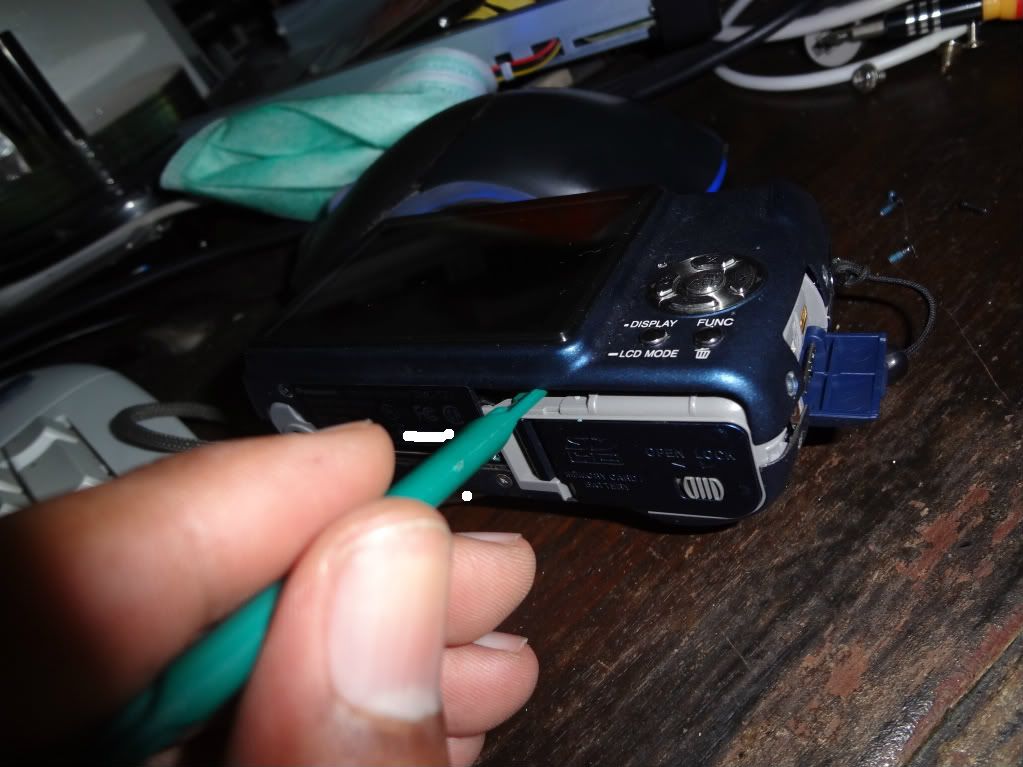
Image size reduced, original size: 1023 x 767. http://i162.photobucket.com/albums/t263/khat17/Camera-Lumix-Fix/DSC00391.jpg to view the image in its original dimension.
After prying it up, carefully remove the rear cover and LCD. There are two ribbon cables that need to be removed.
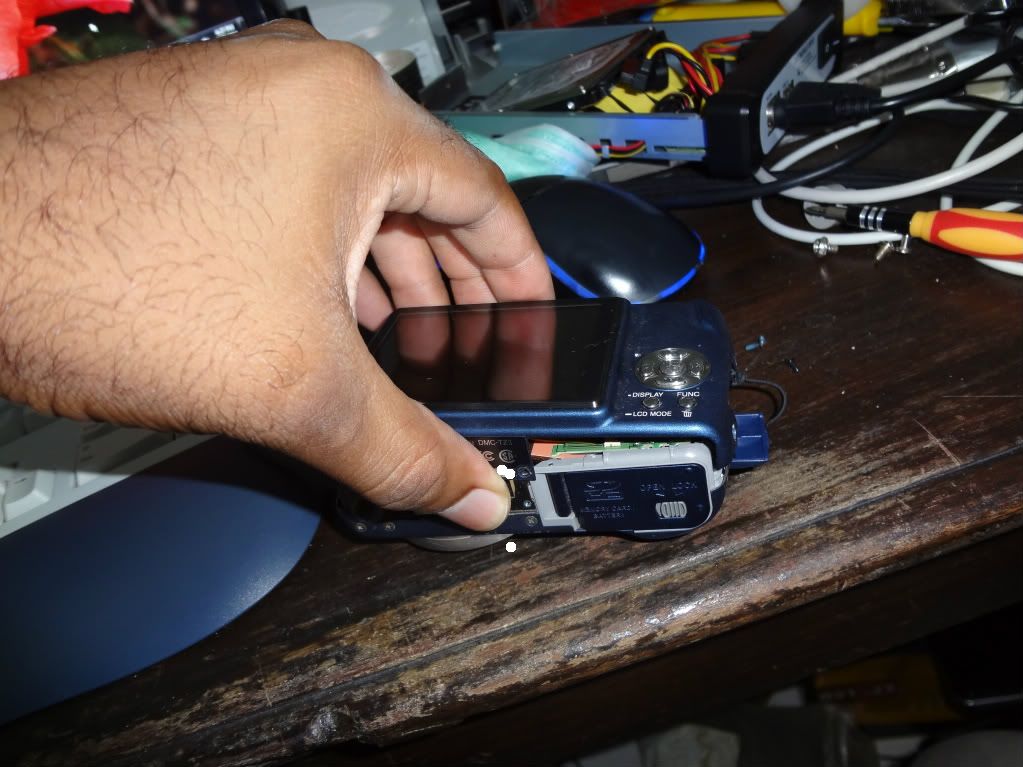
Image size reduced, original size: 1023 x 767. http://i162.photobucket.com/albums/t263/khat17/Camera-Lumix-Fix/DSC00392.jpg to view the image in its original dimension.
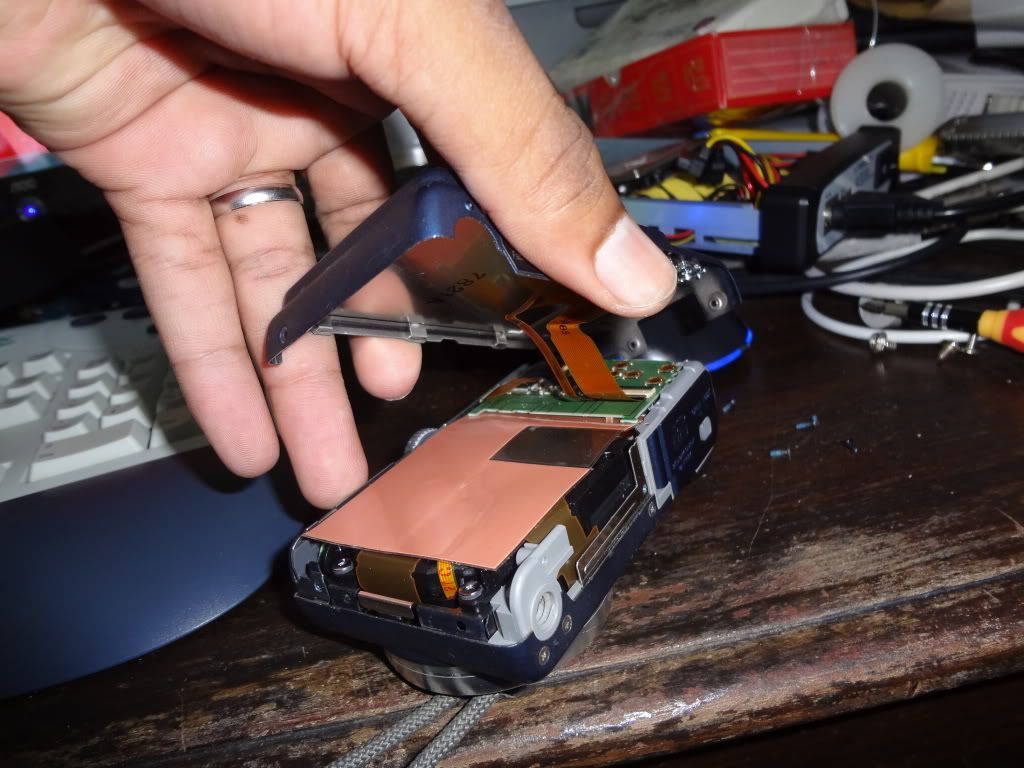
Image size reduced, original size: 1024 x 768. http://i162.photobucket.com/albums/t263/khat17/Camera-Lumix-Fix/DSC00393.jpg to view the image in its original dimension.
Use a pry tool to lift the indicated areas and then remove the cable either by hand or using the proper tweezers.
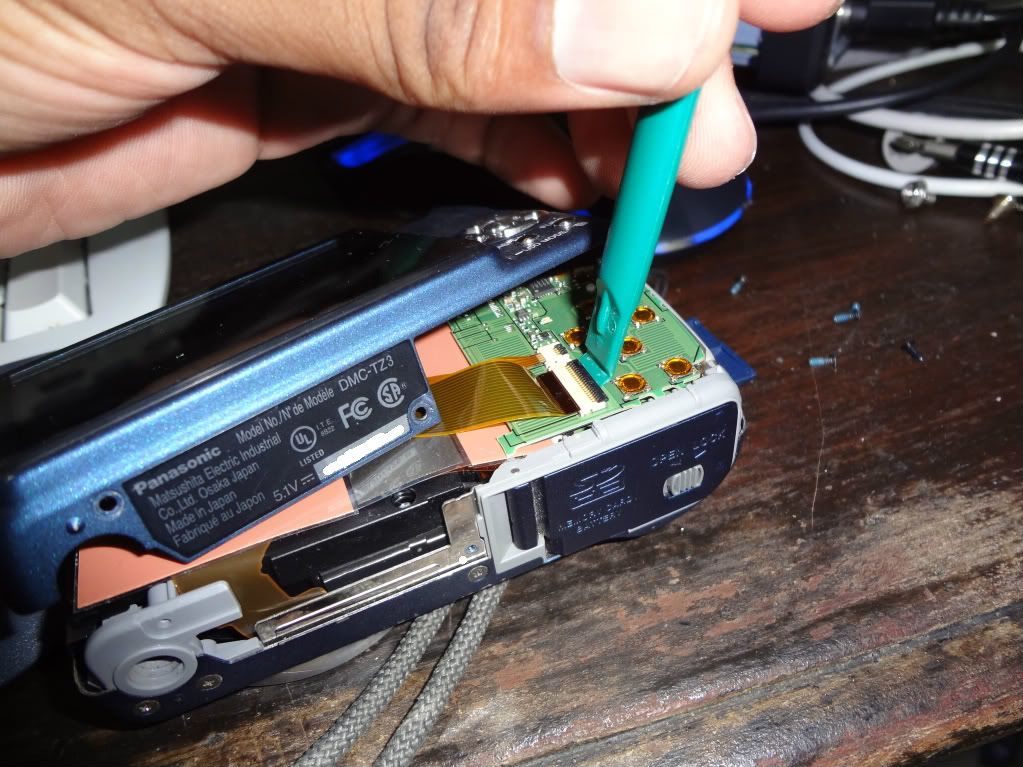
Image size reduced, original size: 1023 x 767. http://i162.photobucket.com/albums/t263/khat17/Camera-Lumix-Fix/DSC00394.jpg to view the image in its original dimension.
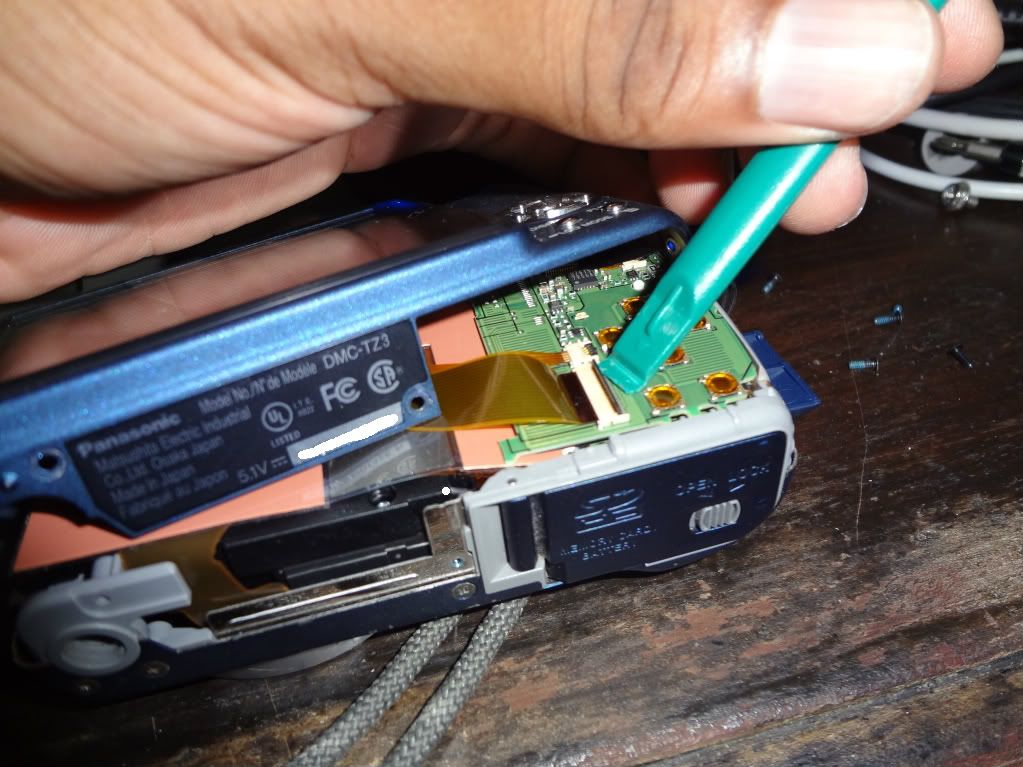
Image size reduced, original size: 1023 x 767. http://i162.photobucket.com/albums/t263/khat17/Camera-Lumix-Fix/DSC00395.jpg to view the image in its original dimension.
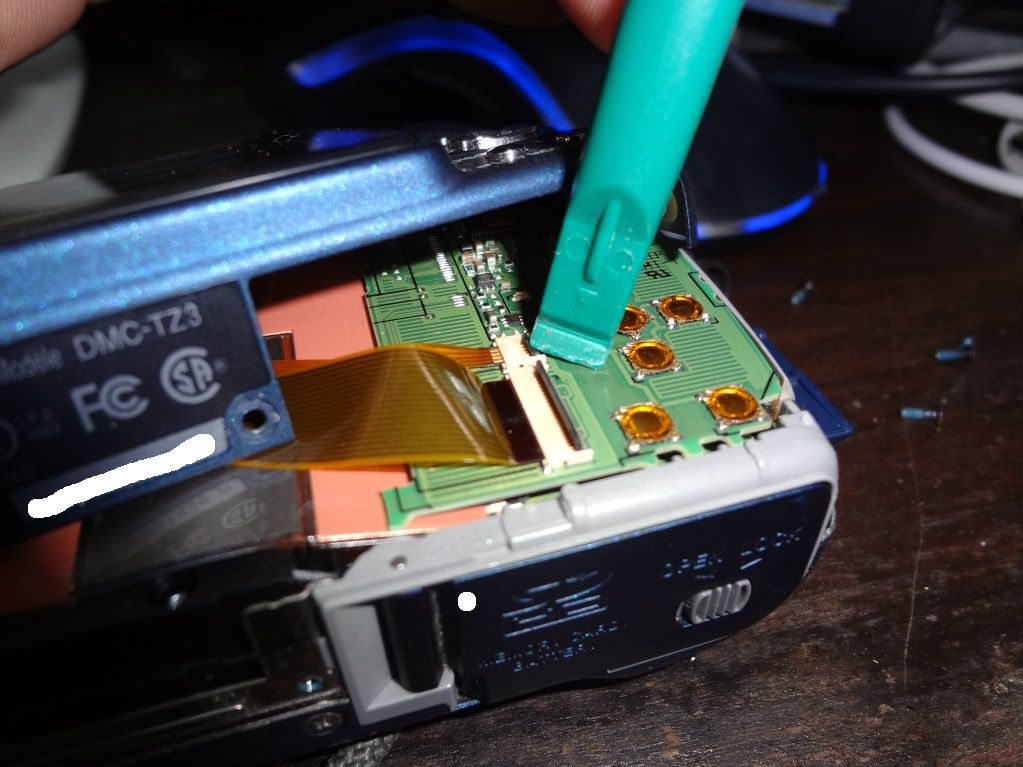
Image size reduced, original size: 1023 x 767. http://i162.photobucket.com/albums/t263/khat17/Camera-Lumix-Fix/DSC00396.jpg to view the image in its original dimension.

Image size reduced, original size: 1024 x 768. http://i162.photobucket.com/albums/t263/khat17/Camera-Lumix-Fix/DSC00397.jpg to view the image in its original dimension.
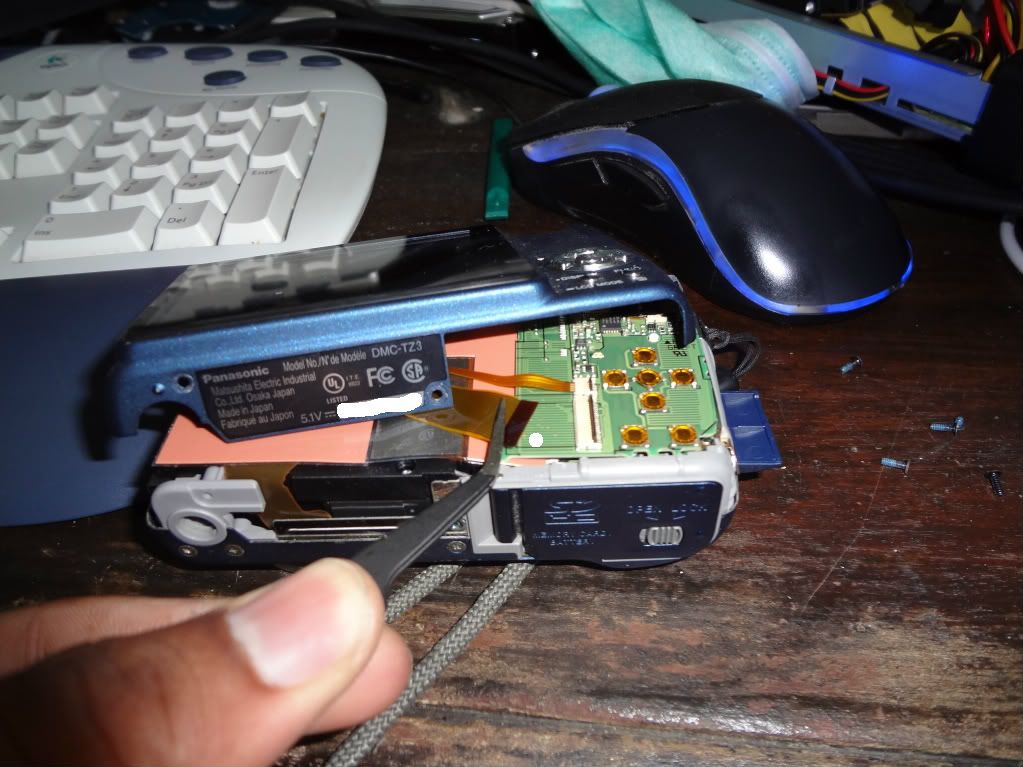
Image size reduced, original size: 1023 x 767. http://i162.photobucket.com/albums/t263/khat17/Camera-Lumix-Fix/DSC00398.jpg to view the image in its original dimension.
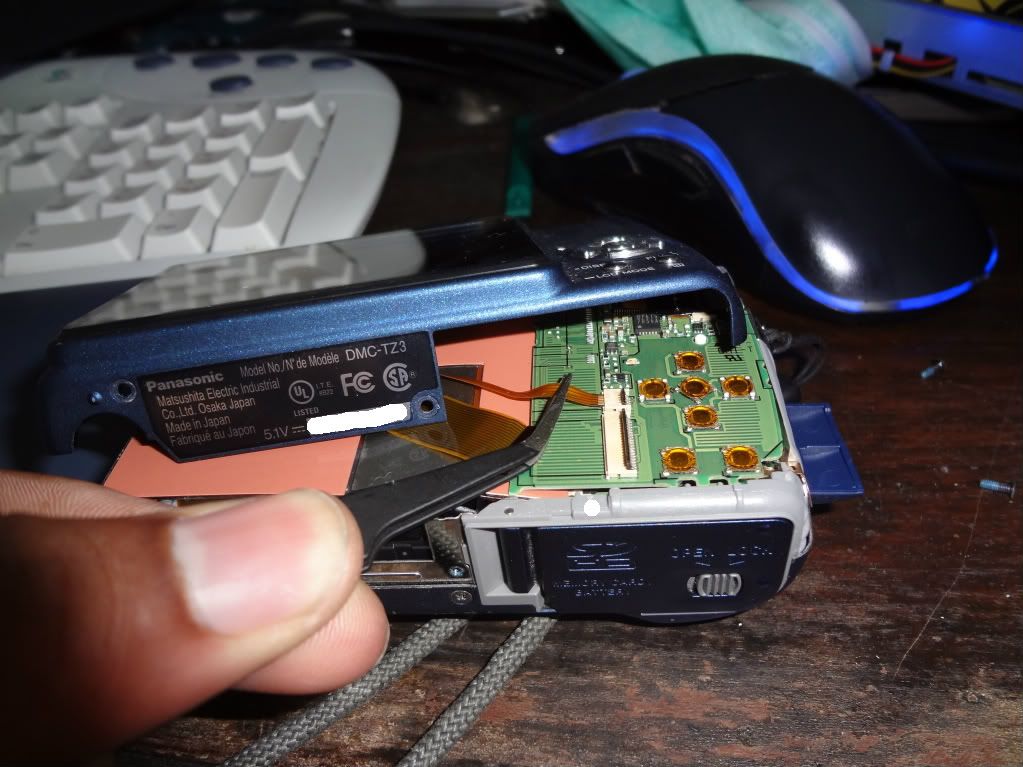
Image size reduced, original size: 1023 x 767. http://i162.photobucket.com/albums/t263/khat17/Camera-Lumix-Fix/DSC00399.jpg to view the image in its original dimension.
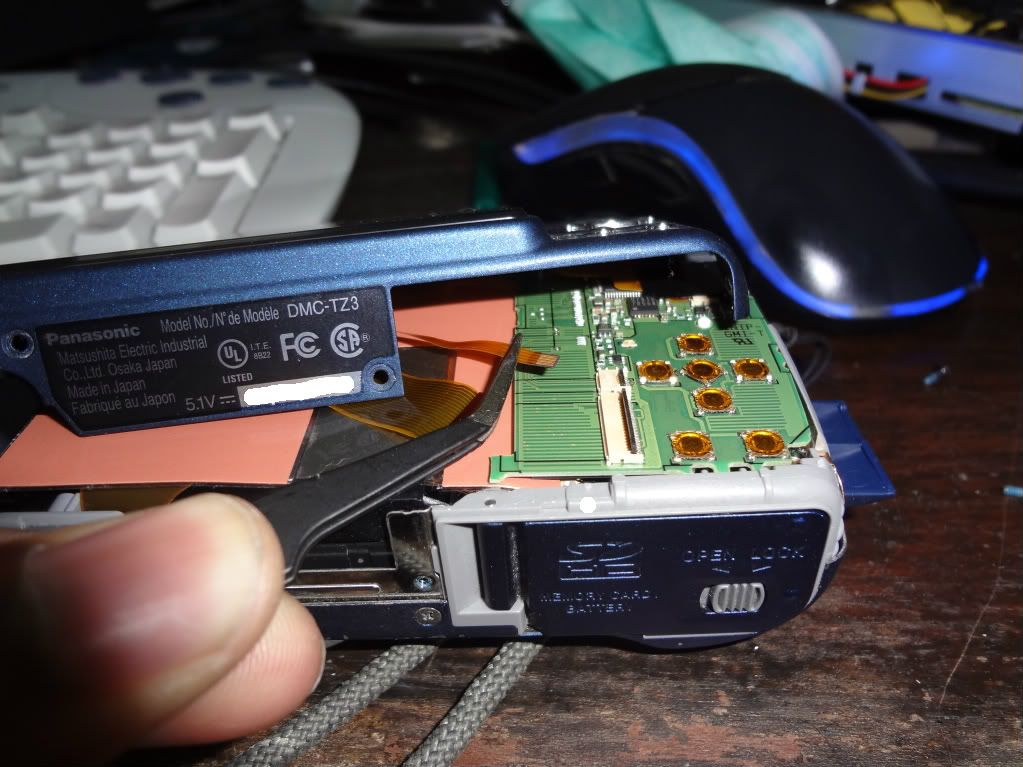
Image size reduced, original size: 1023 x 767. http://i162.photobucket.com/albums/t263/khat17/Camera-Lumix-Fix/DSC00400.jpg to view the image in its original dimension.
After removing the cables, lift the back and place it in a safe place.
Next is the circuit board indicated. Use the pry-tool and lift from the bottom. There are no screws in this part, so don't be afraid to pry it up.
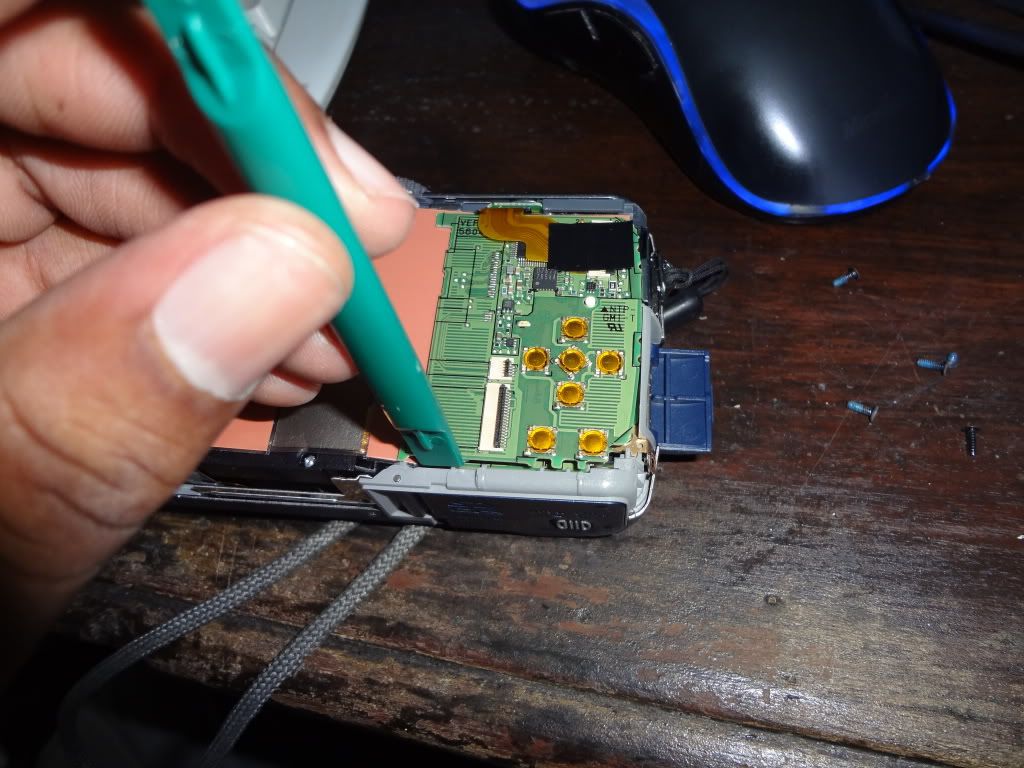
Image size reduced, original size: 1024 x 768. http://i162.photobucket.com/albums/t263/khat17/Camera-Lumix-Fix/DSC00402.jpg to view the image in its original dimension.
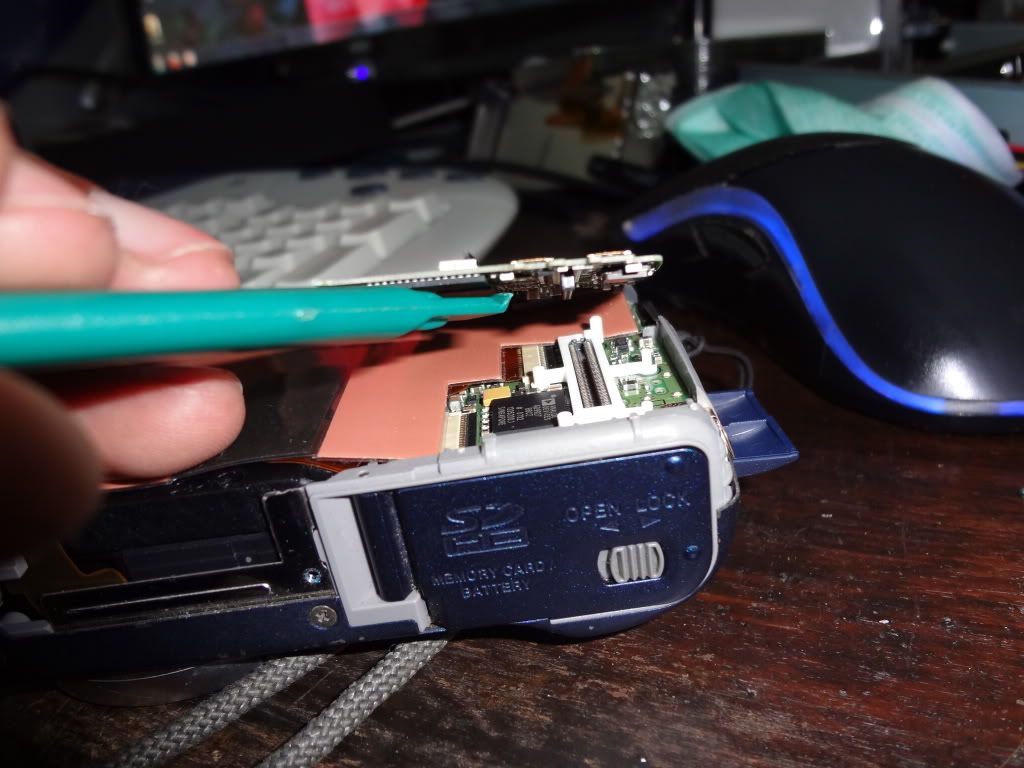
Image size reduced, original size: 1024 x 768. http://i162.photobucket.com/albums/t263/khat17/Camera-Lumix-Fix/DSC00403.jpg to view the image in its original dimension.
Once up you can fold it over the top of the camera. You may disconnect it if you like, but for replacing the CCD you don't have to. Also - ensure your work area doesn't look as cramped as mine

The shielding that is present can now be removed and placed in a safe place.
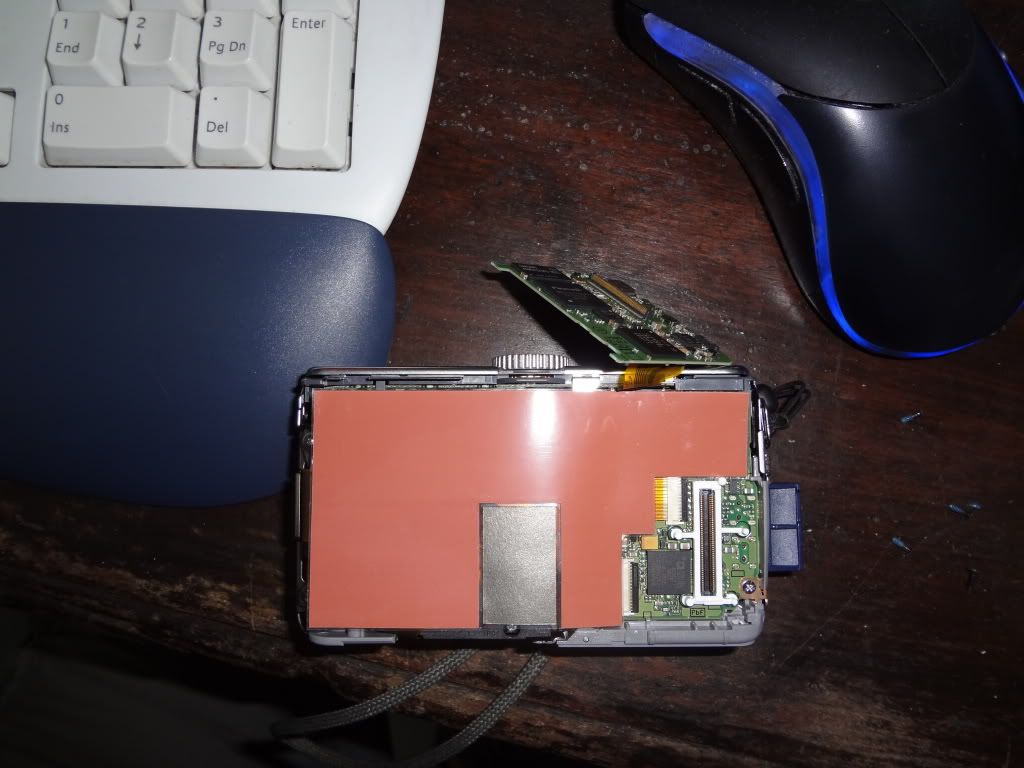
Image size reduced, original size: 1024 x 768. http://i162.photobucket.com/albums/t263/khat17/Camera-Lumix-Fix/DSC00404.jpg to view the image in its original dimension.
Next you need to remove the three indicated screws.
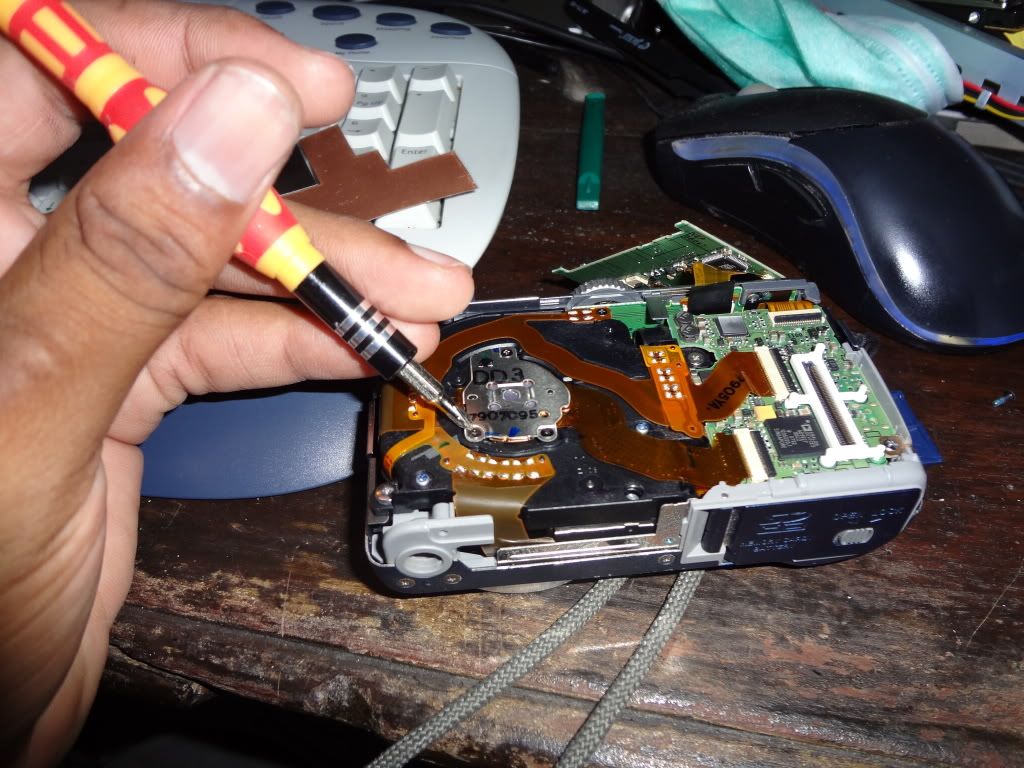
Image size reduced, original size: 1024 x 768. http://i162.photobucket.com/albums/t263/khat17/Camera-Lumix-Fix/DSC00406.jpg to view the image in its original dimension.
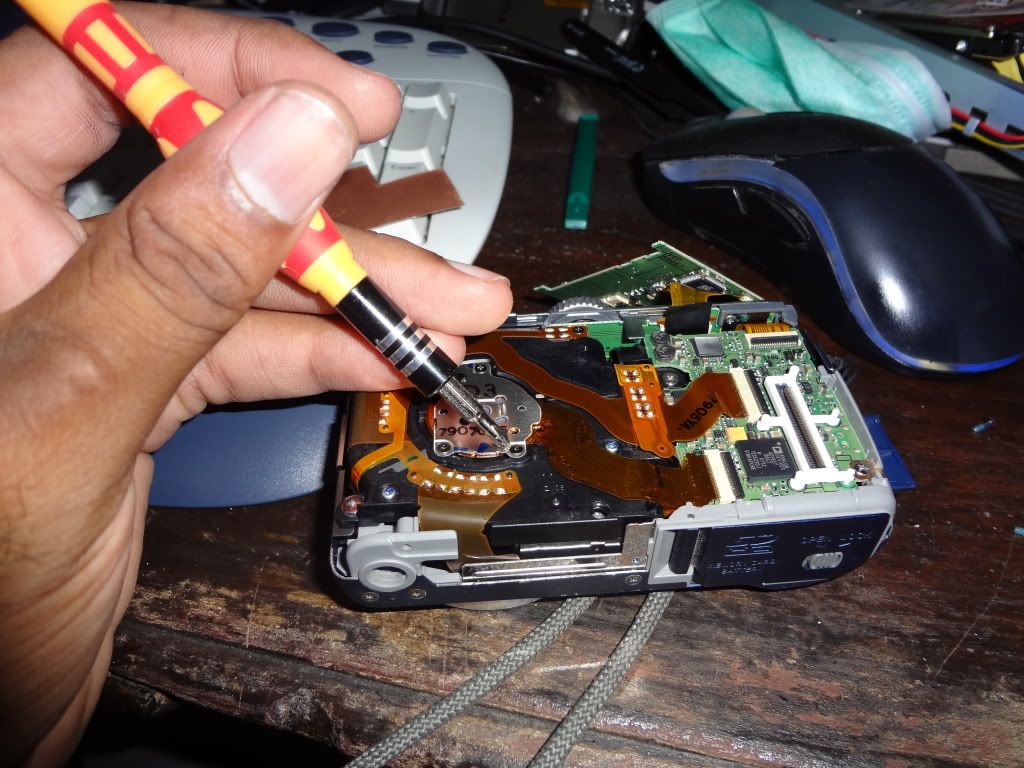
Image size reduced, original size: 1024 x 768. http://i162.photobucket.com/albums/t263/khat17/Camera-Lumix-Fix/DSC00407.jpg to view the image in its original dimension.
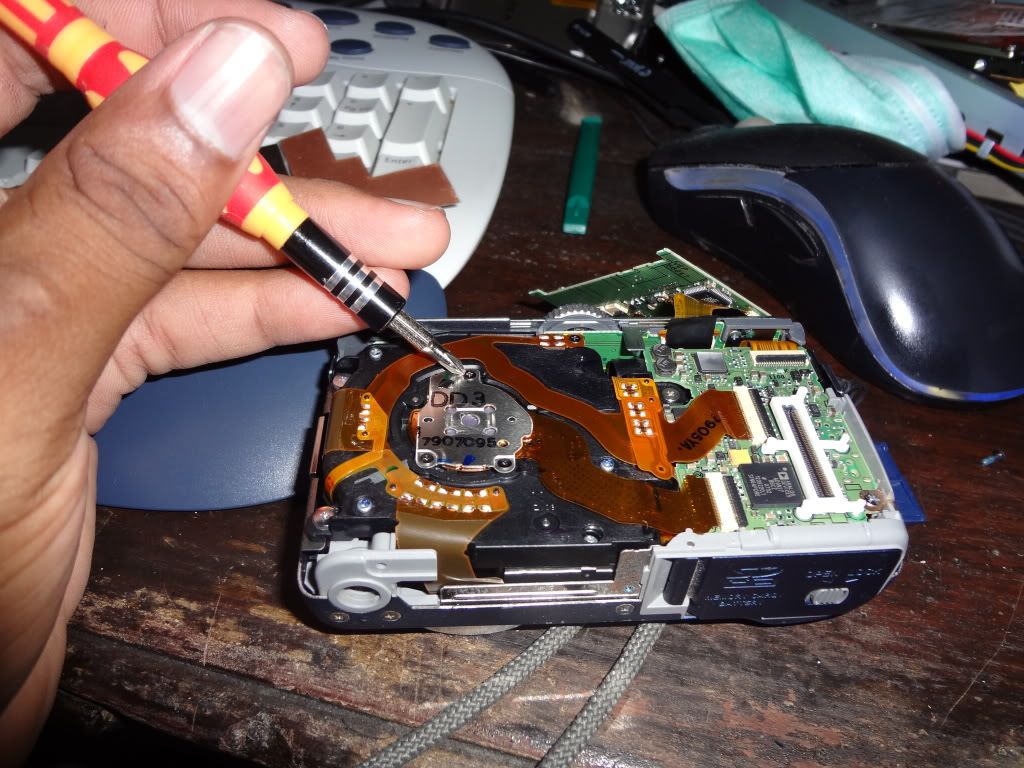
Image size reduced, original size: 1024 x 768. http://i162.photobucket.com/albums/t263/khat17/Camera-Lumix-Fix/DSC00408.jpg to view the image in its original dimension.
Once the screws are removed, lift the indicated tab and then remove the ribbon cable.

Image size reduced, original size: 1024 x 768. http://i162.photobucket.com/albums/t263/khat17/Camera-Lumix-Fix/DSC00409.jpg to view the image in its original dimension.
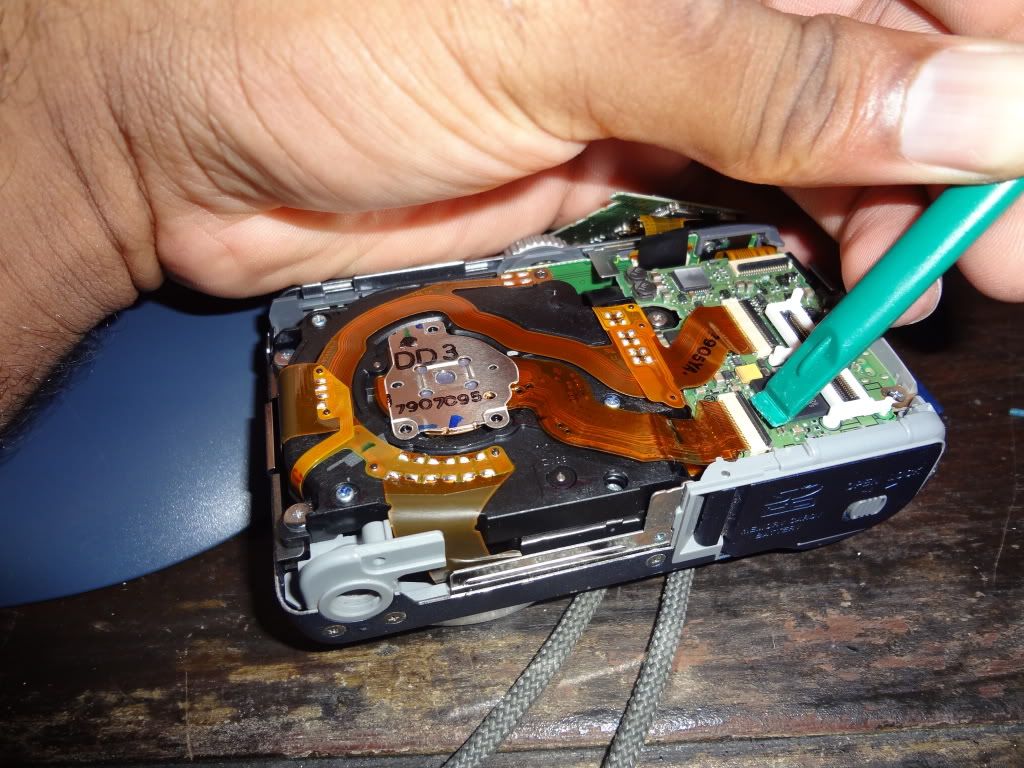
Image size reduced, original size: 1024 x 768. http://i162.photobucket.com/albums/t263/khat17/Camera-Lumix-Fix/DSC00410.jpg to view the image in its original dimension.
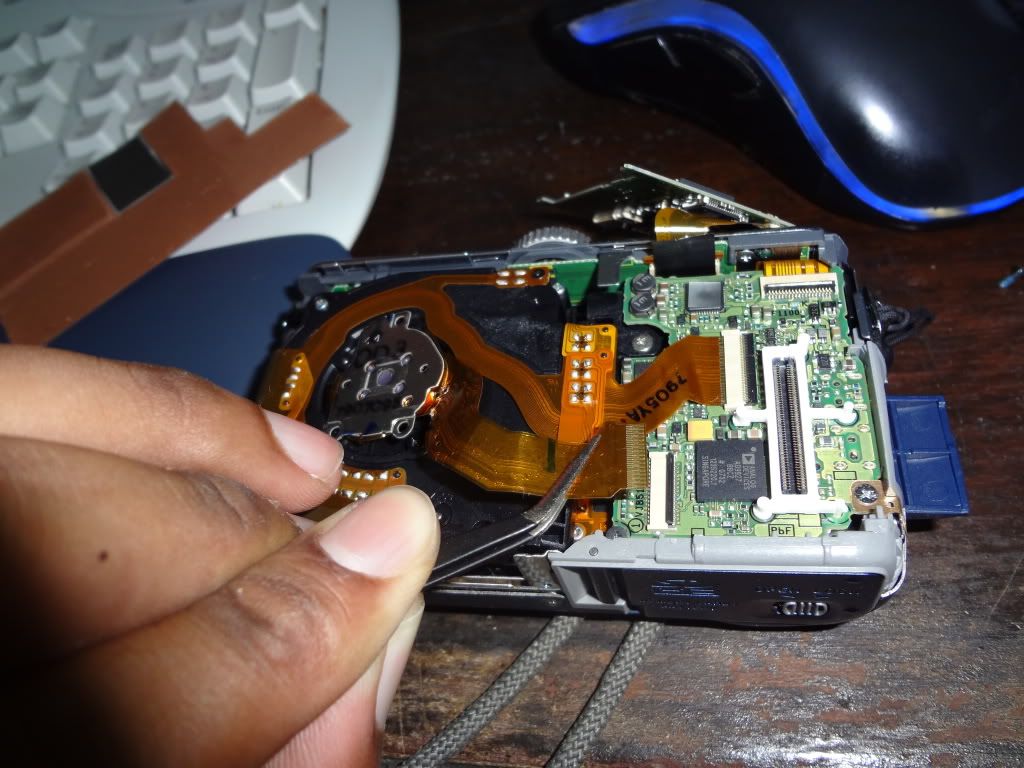
Image size reduced, original size: 1024 x 768. http://i162.photobucket.com/albums/t263/khat17/Camera-Lumix-Fix/DSC00412.jpg to view the image in its original dimension.
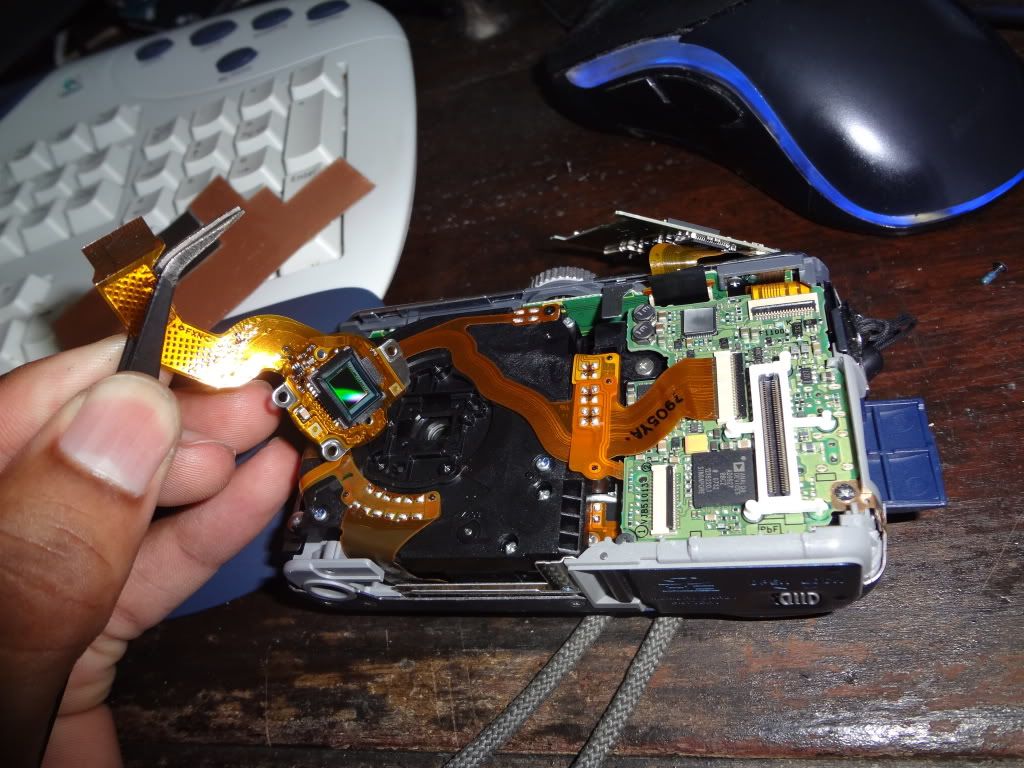
Image size reduced, original size: 1024 x 768. http://i162.photobucket.com/albums/t263/khat17/Camera-Lumix-Fix/DSC00413.jpg to view the image in its original dimension.
You can then use your second Lumix or CCD and replace. Just follow the instructions in reverse.
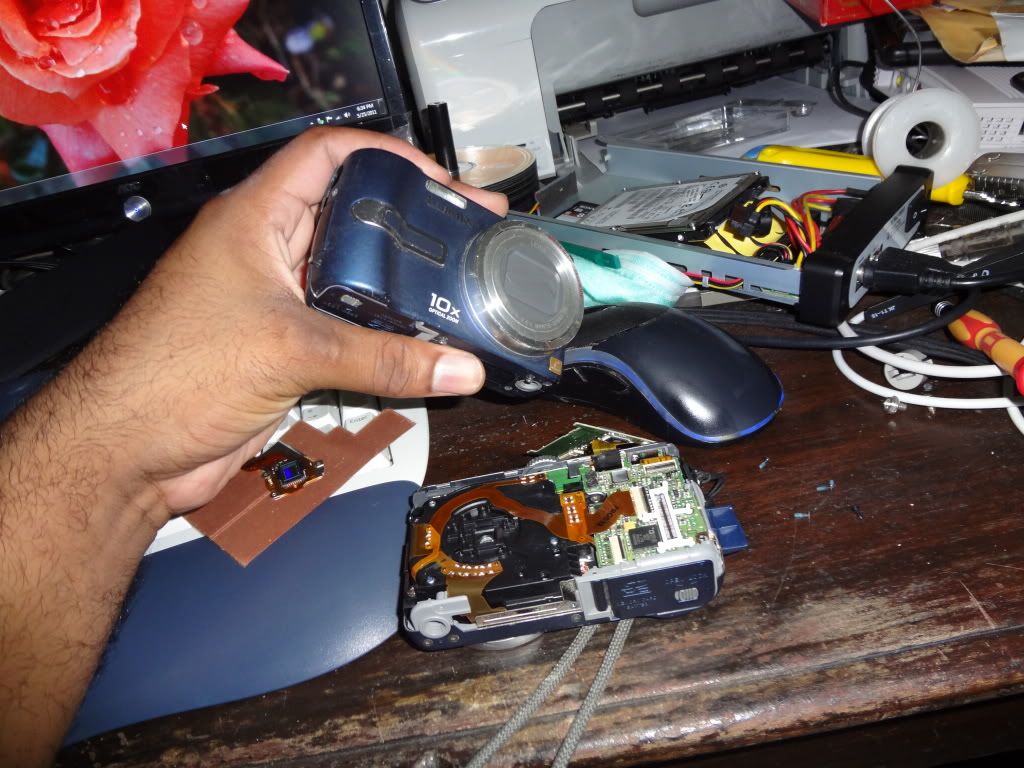
Image size reduced, original size: 1024 x 768. http://i162.photobucket.com/albums/t263/khat17/Camera-Lumix-Fix/DSC00414.jpg to view the image in its original dimension.
Once done your pics should look much better.
Image size reduced, original size: 1022 x 766. http://i162.photobucket.com/albums/t263/khat17/Camera-Lumix-Fix/P1030937.jpg to view the image in its original dimension.

Image size reduced, original size: 1024 x 768. http://i162.photobucket.com/albums/t263/khat17/Camera-Lumix-Fix/P1030938.jpg to view the image in its original dimension.
Also - I noticed that the replacement CCD had slightly different numbers. If these make any sense to you or make it any easier for you to get the part please feel free.
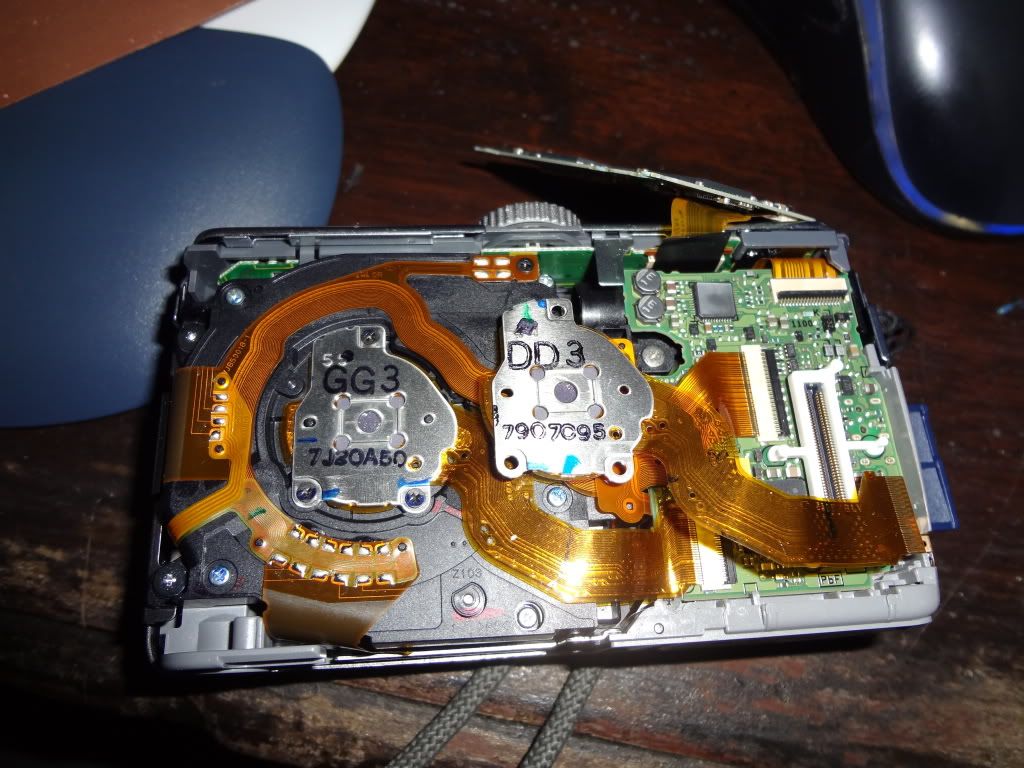
Image size reduced, original size: 1024 x 768. http://i162.photobucket.com/albums/t263/khat17/Camera-Lumix-Fix/DSC00415.jpg to view the image in its original dimension.
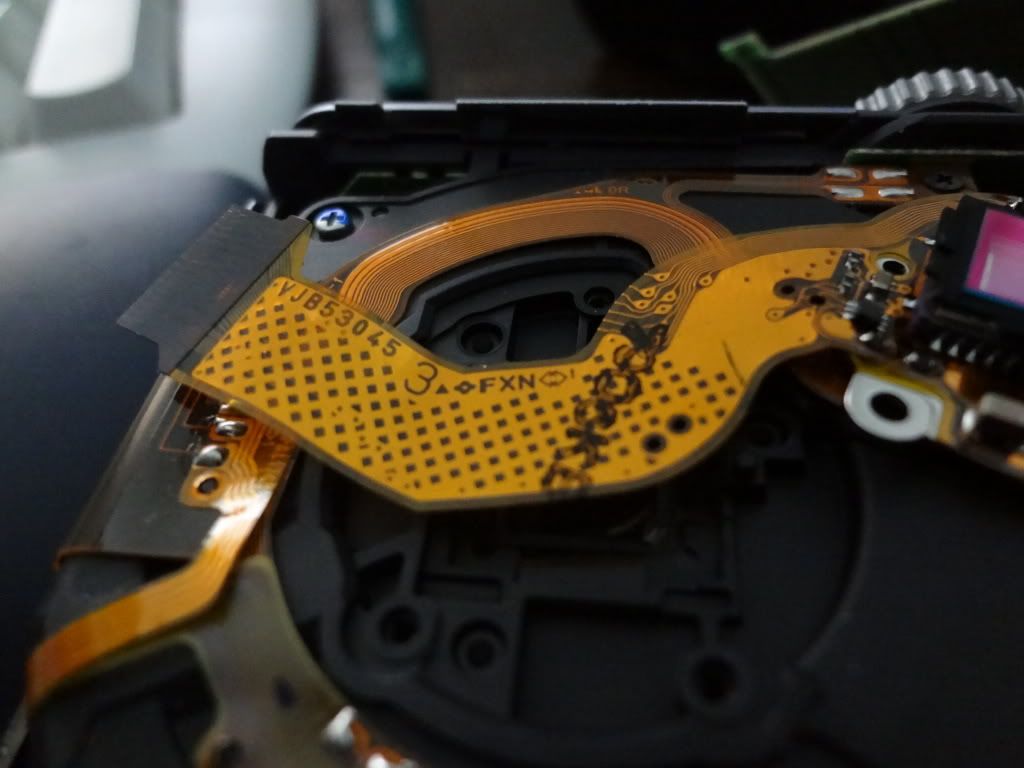
Image size reduced, original size: 1024 x 768. http://i162.photobucket.com/albums/t263/khat17/Camera-Lumix-Fix/DSC00417.jpg to view the image in its original dimension.
Hopefully this helps you out! Have fun!

