 Close Topic Options
 | Welcome Guest ( Log In | Register ) | Resend Validation Email |
DJ Panel ( Server Stats ) Song History Initial D World Chat Room (Discord) Broadband Stream RADIO BROADCAST » streaming at 96kbps with 2 unique listeners, playing Black Power - Destination Love Important Rules • Please use the Search function before you start a topic. Posting a repeated thread will result in a verbal warning.
• Advertising without any actual participation in the forums is consider spamming. Violator will be issued an actual warning.
• Post Initial D / Automotive related merchandise here. Unrelated threads will be locked and the topic starter could receive a verbal warning.
» FORUM MODERATOR : FORUM MODERATOR
| 32 Pages | |
Views: 207,230 · Replies: 784
IDW Modellers Thread, Galleries, projects, discussions| Kitty | Posted: Feb 8 2008, 12:29 AM |
Bad Luck  Group: Advanced Members Posts: 653 Member No.: 23,812 Joined: Mar 30th 2007 Location: Parts Unknown | Hey all. I figured I'd show off what little I've done so far (on my new and improved cameraphone! X3). I figured this color green was close enough to being Millenium Jade without having to actually mix up my own. 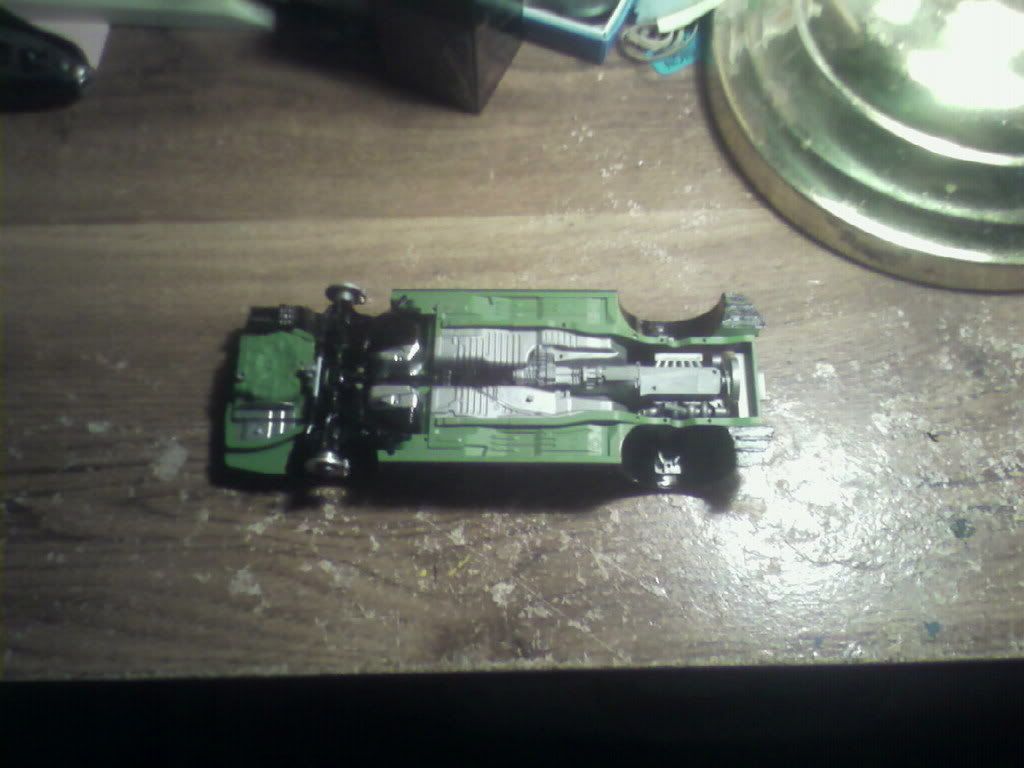 Also I wasn't sure if I was supposed to paint the entire frame the body color since the instructions didn't really specify. A majority of the underside parts called for a semigloss black but I don't have any so I opted for the regular gloss black instead. Since I don't have a small or flexible enough brush for really minute detail work I used the tip of a toothpick. It sticks to the wood just enough to apply a good enough coat and it also doesn't leave any unsightly bubbles like my brushworking skills do. :/ I'd say it turned out pretty good all things considered. Here's a closer look:  So far I've completed the rear suspension and attached it to the underside of the car and detailed the brakes/tire mounts. Kinda weird since the instructions called for a gold flake color, but it turned out alright with the gold paint I forgot I had. Well, that's all for now. When I'm done working and find some motivation I'll finish some more of it and share my progress. Til next time! |
|
| shudeen | Posted: Feb 13 2008, 11:56 PM |
Shmuck Group: Members Posts: 3 Member No.: 28,699 Joined: Feb 13th 2008 Location: Malaysia | Someone has AE86 or FC stock? I'm really interested to buy. |
|
| cosmoz | Posted: Feb 14 2008, 06:47 AM |
Juicylicious! Group: Advanced Members Posts: 1,244 Member No.: 7,085 Joined: May 1st 2005 Location: Singapore | I believe thats the Kei office S15 you're building.. can't wait to see it when its finish! |
|
| Kitty | Posted: Feb 17 2008, 07:10 PM |
Bad Luck Group: Advanced Members Posts: 653 Member No.: 23,812 Joined: Mar 30th 2007 Location: Parts Unknown | Well, you're almost right Cosmoz. That's my GTR34 V-Spec II Nur's underside. I'm not building the S15 at the moment, but it's gonna be my next project. :3 They're both from Nissan and the undersides look very similar, if not identical in design I suppose. Weird, I didn't notice that before. Anyways, I have more pictures: 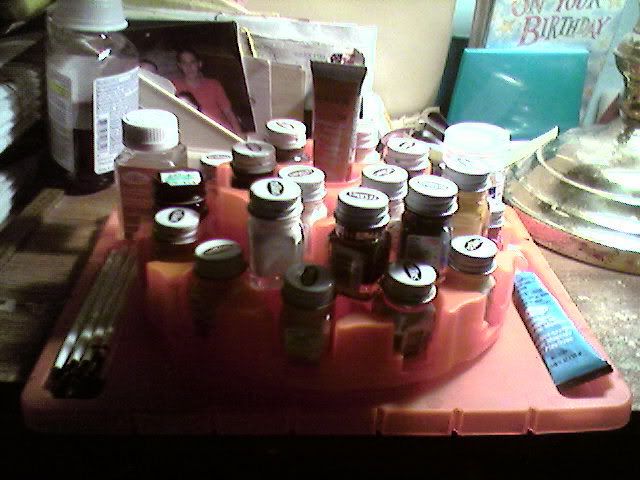 I don't remember how I got this, but I found it in my room a couple days ago and it was in a bag of assorted acrylic paints from Testors, so I decided to take a picture of it with a few of my other paints and brushes. Also, I finally got a bottle of acrylic thinner so I can clean up the brushes I didn't use enamel paints on. Turns out enamel thinner doesn't do squat to acrylic paint.  Speaking of, I tried to mix up my own colors but this is how that turned out: Speaking of, I tried to mix up my own colors but this is how that turned out: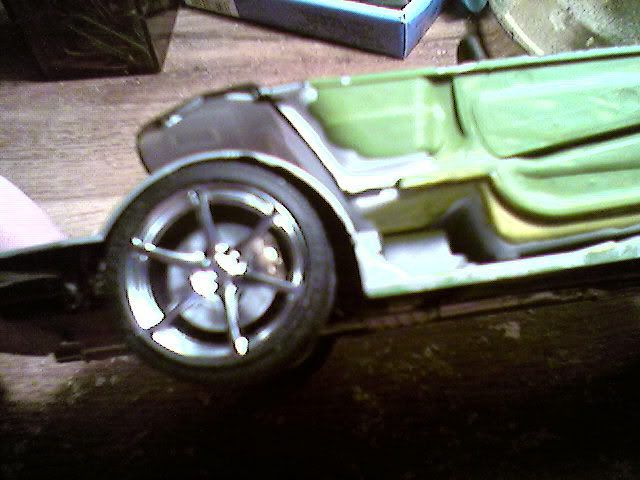 It seems acrylic-based paint doesn't mix at all with enamel-based paints. :/ It just made a swirly, uneven mess when I decided to test it on the sides there. However, it did make the proper color it seems so I just have to mix either the acrylic green zinc chromate color with an acrylic yellow paint (which I don't have) or the new bottle of enamel yellow zinc chromate I got with an enamel green paint. Turns out I had a few bottles of the green at one point and they ended up missing somehow. :/ So until I get another bottle of paint I'm putting this project on hold for the moment. Also, here's another picture: 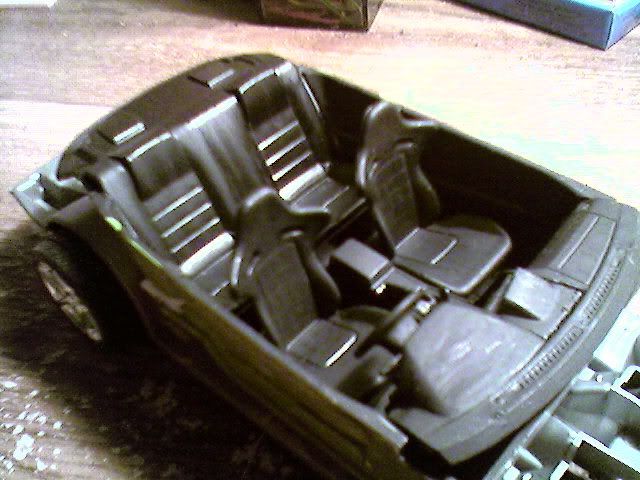 In my usual style I "murdered out" the interior in flat and gloss blacks. :3 I know if I ever got my own car I'd want it like this. I put the decals on the inside and all but the GTR logo that goes in the center of the steering wheel kept falling off so I finally just glued it on after the third time. I almost lost the decal on the floor. :/ Also when I was putting the front wheels together the top tabs that make the tires pivot snapped off and I tried gluing them back on but they didn't stay it seems. So really the only thing holding the front tires on are the bottom tabs and the little connector arm between them. I don't know why but the wheels are almost always the hardest part of a model for me to put together. Well that's all for now, so until next time. |
|
| Metamorphic | Posted: Mar 12 2008, 02:15 AM |
IDW Goldmember Group: Advanced Members Posts: 2,380 Member No.: 4,338 Joined: Nov 18th 2004 Location: Update Profile | Yet another Gundam model! MG Strike Freedom (Full Burst) finally completed really brings a tear to the eye. This model was awaiting completion for months on end waiting for a spare part to come in from Japan. Fed up with the wait I went to buy the standard kit and took the opportunity to redo all the minor imperfections. I replaced parts that got dirty or damaged eg excess paint, careless handling (snapped a wing piece hence needing to get spare parts) and finger print acid. And now close to a year afterwards the Strike Freedom is ready to be shown to the IDW community!   This post has been edited by Metamorphic on Mar 12 2008, 02:23 AM |
|
| MattW | Posted: Mar 23 2008, 05:51 PM |
VOLVO For Life. Group: Advanced Members Posts: 6,069 Member No.: 23,273 Joined: Feb 17th 2007 Location: Southington Connecticut, USA | Well, I've had this model for a few years, decided it was finally time to put it together, haha. Revell snap together SMART Fortwo. I normally don't buy snaptogether, but, I just wanted to customize this one, haha. After two or so years, I'm finally getting around to finishing it. Of course, it's all flat-blacked out (I think I could make a whole model out of just flat black and silver). I need another kit though, as I have lost the front axle, fron grille, and headlight buckets, oh well. It has huge gaps in the panels right now, because it was quickly mocked up. Sports Revell Acura Integra Type R wheels, and they look goooood. Here's the picture.  |
|
| marcopreto | Posted: Apr 14 2008, 11:14 AM |
IDW Expert Member Group: Members Posts: 149 Member No.: 6,599 Joined: Apr 11th 2005 Location: Portugal | Hi to all: After finishing the R32, and while trying to complete the Tofu shop AE86, I started this litle model. It's a WWII 1/72 Fw-190 D9 from Tamiya. I bought it as a second hand model, already partially built (these models in Portugal are way to expensive, being around 20 €; Academy and Revell offering are sometimes less then half of this price). Here are somo photos:    I hope you like it. Cheers Marco Preto P.S.: The swastika is on the model purely for historic reasons. I don't support any nazi movement or ideas. If anyone feels that I should remove these photos, please let me know and they will be removed asap. This post has been edited by marcopreto on Apr 14 2008, 11:16 AM |
|
| brian mayhem | Posted: Apr 14 2008, 04:37 PM |
IDW Goldmember Group: Advanced Members Posts: 4,294 Member No.: 13,958 Joined: Oct 22nd 2005 Location: Binghamton, New York | Your work is simply amazing. How long does it take for you to complete a piece? You could use Nakazato's GTR for an example; or for a shoutout to MV88, that model plane you have going on there. |
|
| marcopreto | Posted: Apr 26 2008, 11:33 AM |
IDW Expert Member Group: Members Posts: 149 Member No.: 6,599 Joined: Apr 11th 2005 Location: Portugal | Hi: The GT-R took me about 3 months to complete, but I just worked on it for some hours during weekends, or on one or two evenings during the week. The FW-190 D9 was just completed:     Cheers Marco Preto |
|
| Kitty | Posted: Jul 2 2008, 04:17 PM |
Bad Luck Group: Advanced Members Posts: 653 Member No.: 23,812 Joined: Mar 30th 2007 Location: Parts Unknown | Alright, here's one you guys might actually like for once. I found this little gem at the local con on the last day for a mere 4 dollars. It was the only one there and the dealer was very helpful in finding it for me. Behold!  Yes, a Hygog suit from 0080. I opted to give one arm the full machinegun and missile complement and the other one an unfired missile pod. This thing took only a couple days to put together and required very minimal painting. It took even less time than my old Vayeate. >_> 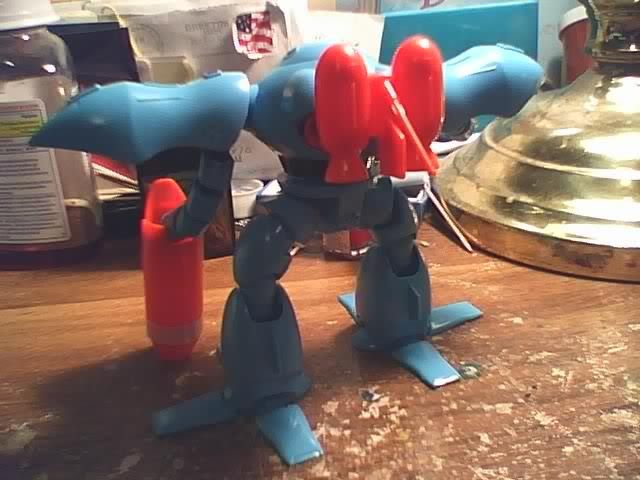 That sweet jetpack brings back so many memories. ::sigh:: Hope you guys enjoy it! :3 |
|
| marcopreto | Posted: Oct 9 2008, 04:58 AM |
IDW Expert Member Group: Members Posts: 149 Member No.: 6,599 Joined: Apr 11th 2005 Location: Portugal | Here's another model that I've completed yesterday. It's a small 1/72 Revell model of a Leopard 2 A4:   With primer:   With basic decoration:   With base and final weathering:        This one was built as a gift for my brother. He originally started the model some ten year ago, and it was on the self for that long. Some 3 weeks ago I cleaned it, had some details and completed it for him. Let's hope he likes it. Cheers Marco Preto This post has been edited by marcopreto on Oct 9 2008, 05:00 AM |
|
| Shirogane | Posted: Oct 9 2008, 07:54 PM |
SCREEEEEEECHING INTENSIFIES Group: Advanced Members Posts: 5,595 Member No.: 17,722 Joined: May 10th 2006 Location: Washington | This would probably be my actual first post but, Marcopreto, you and your models ROCK. I am honestly..jealous of you.  And I want to build a 1/12 version of a 280Z, but I can't find it anywhere. Anyone know where I can find one? |
|
| marcopreto | Posted: Oct 10 2008, 11:56 AM |
IDW Expert Member Group: Members Posts: 149 Member No.: 6,599 Joined: Apr 11th 2005 Location: Portugal | I believe there is a 1/12 Tamiya kit of the 240Z (it's Tamiya #12008). I'm not sure if the 280Z was ever done on 1/12 scale. Cheers Marco Preto |
|
| Möbius | Posted: Oct 11 2008, 10:18 AM |
IDW Top Poster Group: Advanced Members Posts: 33,844 Member No.: 3,524 Joined: Oct 2nd 2004 Location: Update Profile | Excellent work as usual Marco, I really like that Fw190.  |
Proud Contributor of Initial D World Forums |
| marcopreto | Posted: Oct 13 2008, 12:56 AM | ||
IDW Expert Member Group: Members Posts: 149 Member No.: 6,599 Joined: Apr 11th 2005 Location: Portugal |
Thanks. I know you have a soft spot towards WWII warbirds I have a 1/72 P-51D and 1/72 Fw-190 V1 in "production", just don't know when they'll be completed!These next photos are from the model I'm currently working (all other models are on stand by). It's a old M4A4T Sherman that was used by the Israeli 7th Armored Brigade in the mid-50's. The base kit is the old Dragon 1/35 M4A4 kit.   This model has been built on a tight budget (all added detail came either from photo-etched leftovers, parts "bin" or was scratchbuilt). I hope you like it. Cheers Marco Preto ____Update_____ Here are some more photos: I changed the rear stowage box after talking to a fellow modeler who's an expert on these vehicles  After the primer and preshading  And with the base color done   ___________________________________________________________ One more update I've started painting details  There are no decals here The registration number and the bridging class were airbrushed using photo etched templates. The 7th Armoured Brigade badge was hand painted (with very small brushes and a tooth pick!). Cheers Marco Preto This post has been edited by marcopreto on Jan 30 2009, 04:06 AM | ||
|
| slicked22 | Posted: Feb 4 2009, 06:39 PM |
IDW Full Member Group: Members Posts: 47 Member No.: 28,060 Joined: Jan 3rd 2008 Location: kyusi |      my s2ooo project..... i just made the rear bumper, chin, wing, dual muffler, and the some of the stickers |
|
| chillined | Posted: Feb 15 2009, 09:09 PM | ||
IDW Goldmember Group: Advanced Members Posts: 1,470 Member No.: 23,552 Joined: Mar 10th 2007 Location: In the great snowy areas |
I will actually kill you if that is a Tamiya S2000 model. But it looks like a RC car, so you're lucky. I'm in the process of building a Tamiya Lotus 25 Coventry Climax. Very awesome kit. I just need all the paints. | ||
|
| slicked22 | Posted: Feb 24 2009, 03:50 PM |
IDW Full Member Group: Members Posts: 47 Member No.: 28,060 Joined: Jan 3rd 2008 Location: kyusi | ^its not from tamiya... its from HPI racing.... tamiya s2000 is shorter. it wont fit with my chassis.... i'll update the pictures some other time.... |
|
| marcopreto | Posted: Mar 24 2009, 02:27 AM |
IDW Expert Member Group: Members Posts: 149 Member No.: 6,599 Joined: Apr 11th 2005 Location: Portugal | Nice RC S2000! It scales around 1/10, am I right? Here are some photos of the models I'm working on (working very little in the past few months, because spare time for model making is very scarce this days). Here's the 1/35 scale M4A4(T) on its base (I still need to had some weathering and to complete its crew):   And here is the 1/72 scale P-51 D:    I hope you like them Cheers Marco Preto |
|
| marcopreto | Posted: May 26 2009, 12:49 AM |
IDW Expert Member Group: Members Posts: 149 Member No.: 6,599 Joined: Apr 11th 2005 Location: Portugal | When working on a model for a very long time, I sometimes get tired of it (that's why I have so many in progress models)! I'm presently tired of all my ongoing model projects, so it was time to start working on something completely different from my usual stuff. Last week I started working on a very, very small model. It's a 1/72 Fokker Dr. I (from Eduard), a fighter plane (or should I say triplane) from WWI. For me it's an uncommon subject (I've only build two other WWI planes, and it was a loooong time ago), but it's proving to be lots of fun (the kind that keeps you working on it for hours and hours). A great number of parts came on 3 photo-etched frets, with some plastic parts for items that could not be made with PE metal. I had to tin weld many of them (I think it's a stronger bond than superglue, also providing a cleaner look). I had done some welding on PE parts before, but this was a much extensive work. Here are some photos of the model, prior to painting:       I started painting it on saturday and here's it's present state:      I hope you like it as much as I'm having fun building it! Cheers Marco Preto This post has been edited by marcopreto on Aug 5 2009, 06:28 AM |
|
| Rudy | Posted: May 26 2009, 01:54 AM |
Unregistered | (THIS POST WAS REMOVED BY REQUEST) |
|
| marcopreto | Posted: May 26 2009, 02:40 AM |
IDW Expert Member Group: Members Posts: 149 Member No.: 6,599 Joined: Apr 11th 2005 Location: Portugal | This engines (rotary engines - not wankel rotary engines) were a solution found at that time for the need of power. lightweight and efficient cooling. http://en.wikipedia.org/wiki/Rotary_engine http://www.animatedengines.com/gnome.shtml I believe that Radial engines (which are quite different from these ones - although with a similar look) are lubricated using a normal dry sump system (but I'm not sure). I'm not sure how these engines were lubricated, but I've read they burnt a lot of oil, due to the centrifugal effect of the rotating engine block, which trapped most of the oil near the valve opening (on top of each cylinder). I'm not sure of this information! Are there any mechanical engeneer who can correct me? _____________________________________________________________________ Here are some photos of the completed model:     Cheers Marco Preto This post has been edited by marcopreto on May 28 2009, 01:39 AM |
|
| slicked22 | Posted: May 29 2009, 04:41 AM |
IDW Full Member Group: Members Posts: 47 Member No.: 28,060 Joined: Jan 3rd 2008 Location: kyusi | @marcopreto-yup! its 1/10 scale here is the new look s2000        |
|
| Kelvin | Posted: Jul 14 2009, 01:32 AM |
! Group: Advanced Members Posts: 1,871 Member No.: 24,344 Joined: May 8th 2007 Location: Pallet Town | 1:24 Maisto Murcielago scale model 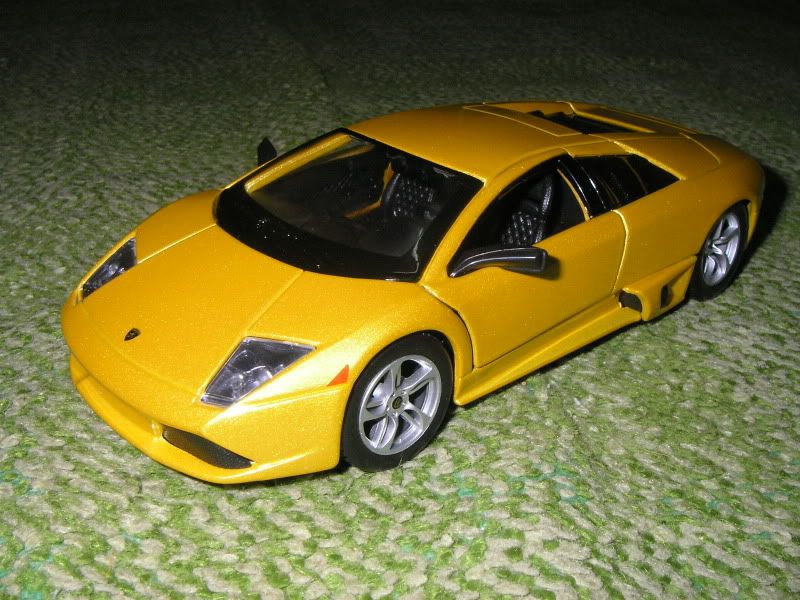  Yea, I did nothing to make it look good. |
|
| marcopreto | Posted: Aug 5 2009, 05:00 AM |
IDW Expert Member Group: Members Posts: 149 Member No.: 6,599 Joined: Apr 11th 2005 Location: Portugal | Here's an update on my P-51 D model.    ____________________________________________________________ And here the completed model:        I hope you like it. Cheers Marco Preto This post has been edited by marcopreto on Aug 25 2009, 03:40 PM |
|
| 32 Pages | |
Powered by Invision Power Board 1.3.1 Final © 2003 IPS, Inc.