 Close Topic Options
 | Welcome Guest ( Log In | Register ) | Resend Validation Email |
DJ Panel ( Server Stats ) Song History Initial D World Chat Room (Discord) Broadband Stream RADIO BROADCAST » streaming at 96kbps with 5 unique listeners, playing date Automotive Section Rules • Scenes depicted in Initial D are strictly fiction. Please follow the traffic rules and drive safely.
• When posting a classified thread, please label it with For Sale (FS), For Trade (FT) or Want To Buy (WTB) in the thread title.
• Use the Search function before you start a new topic. Posting a duplicated thread may earn yourself a verbal warning.
• Personal videos of illegal street racing are prohibited. Do NOT brag about your exploits. Posting a video depicting dangerous/reckless driving behavior on your part will result in an actual warning.
» FORUM MODERATOR : FORUM MODERATOR
| 29 Pages | |
Views: 76,080 · Replies: 716
My 1990 240sx project..., pray for me...seriously| DALAZ_68 |  Posted: Mar 11 2011, 03:57 PM Posted: Mar 11 2011, 03:57 PM |
][0 I M ][o -O- Meter  Group: Advanced Members Posts: 6,860 Member No.: 8,512 Joined: Jun 24th 2005 Location: California | made my way down to West Covina Nissan to pick up more goodies 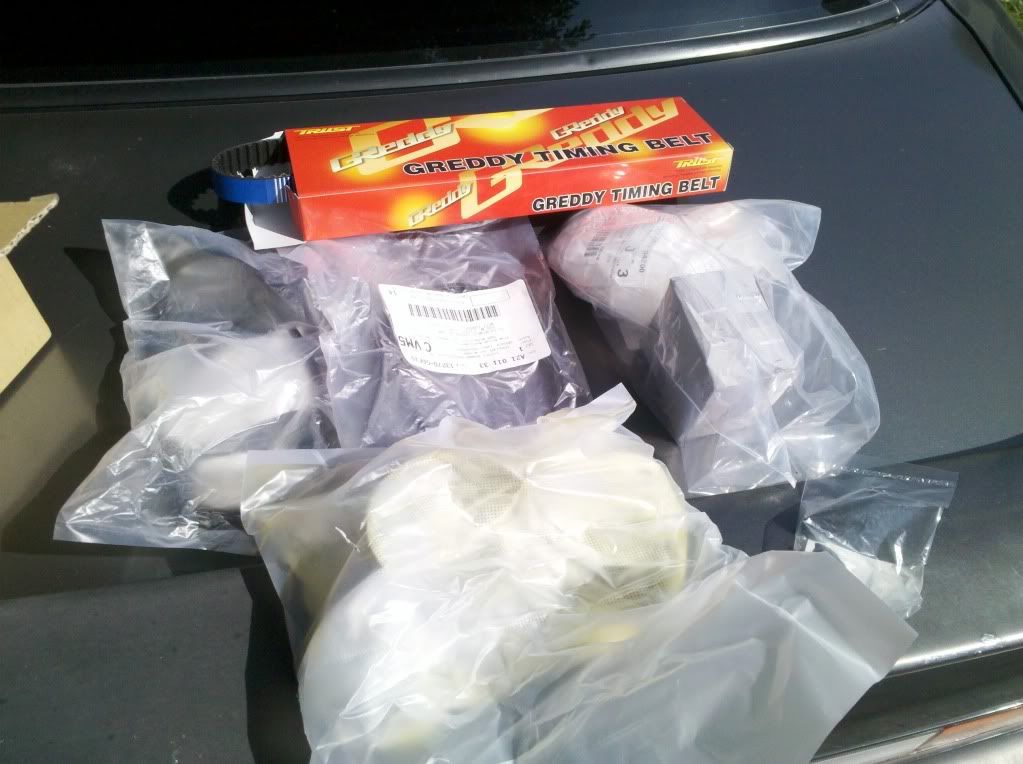 Image size reduced, original size: 1023 x 764. Click here to view the image in its original dimension. Timing Tensioner Idler pulley Tensioner spring Oil Pump OIl pump gasket Valve cover gaskets valve cover rear half moon gaskets oil filter adapter to block and my mech went down to FRsport's store to pick up my Greddy Timing belt... also after work i spent some time finding some hoses for it as well 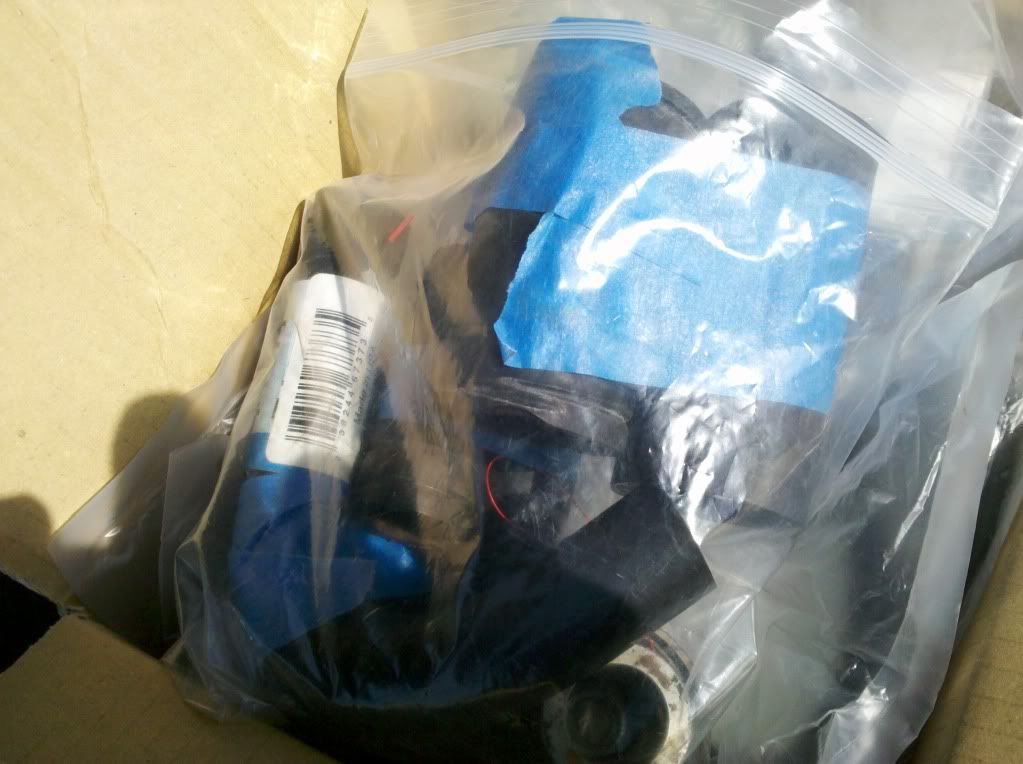 Image size reduced, original size: 1023 x 764. Click here to view the image in its original dimension. the blue tape was is to keep the matching hoses together... |
Proud Contributor of Initial D World Forums |
| HorizontalMitsubishi | Posted: Mar 12 2011, 10:32 AM |
Part of the Tessou Signature Series Group: Advanced Members Posts: 2,439 Member No.: 2,022 Joined: Jun 16th 2004 Location: Torrance California | nice progress, are you going to do anything crazy like a vmount on the car? |
|
| DALAZ_68 | Posted: Mar 12 2011, 05:38 PM |
][0 I M ][o -O- Meter Group: Advanced Members Posts: 6,860 Member No.: 8,512 Joined: Jun 24th 2005 Location: California | nah...i doubt itll need it...secondly this is already branded (to me) as a learning chassis...nothing crazy will get done to it...once i learn it and crash it a few times (pretty sure its bound to happen, lol) im gonna start fresh on a new chassis...  but asfar as the cooling system goes, i need to start looking into a better fan, my old set up was barely cutting it and secondly jimmy rigged to shit...also need to find/fab a fan shroud, i was originally thinking something like the flat panel shroud that comes with some single/dual fan set ups...but the fact that the panels sit flat on the radiator and so far from the engine leads me to believe the air is still dispursing and not making a proper concentrated air flow to the engine...or as good of an air flow...specially with a single fan... which pretty much means fans and a maf are the only things still really missing...  |
Proud Contributor of Initial D World Forums |
| DALAZ_68 | Posted: Mar 18 2011, 11:49 PM |
][0 I M ][o -O- Meter Group: Advanced Members Posts: 6,860 Member No.: 8,512 Joined: Jun 24th 2005 Location: California | bout an hour or so worth of work finishing cleaning up all the nuts and bolts of this midget motor 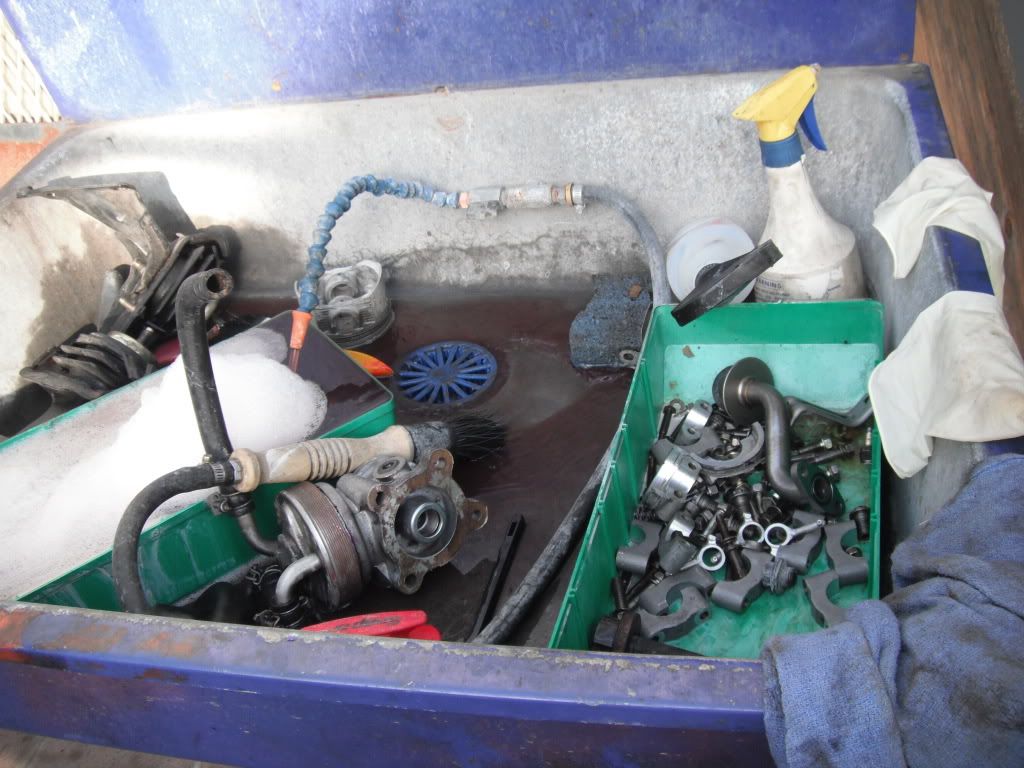 Image size reduced, original size: 1024 x 768. Click here to view the image in its original dimension. 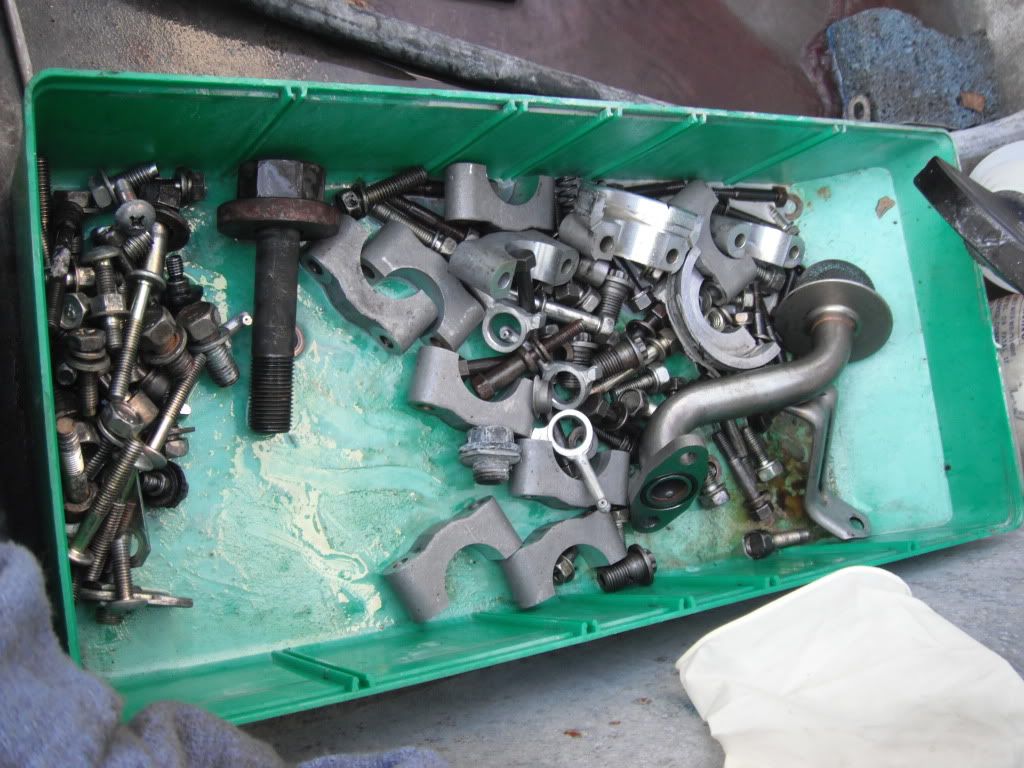 Image size reduced, original size: 1024 x 768. Click here to view the image in its original dimension. all cleaneded...  mechanic finished up rinsing and air drying every part 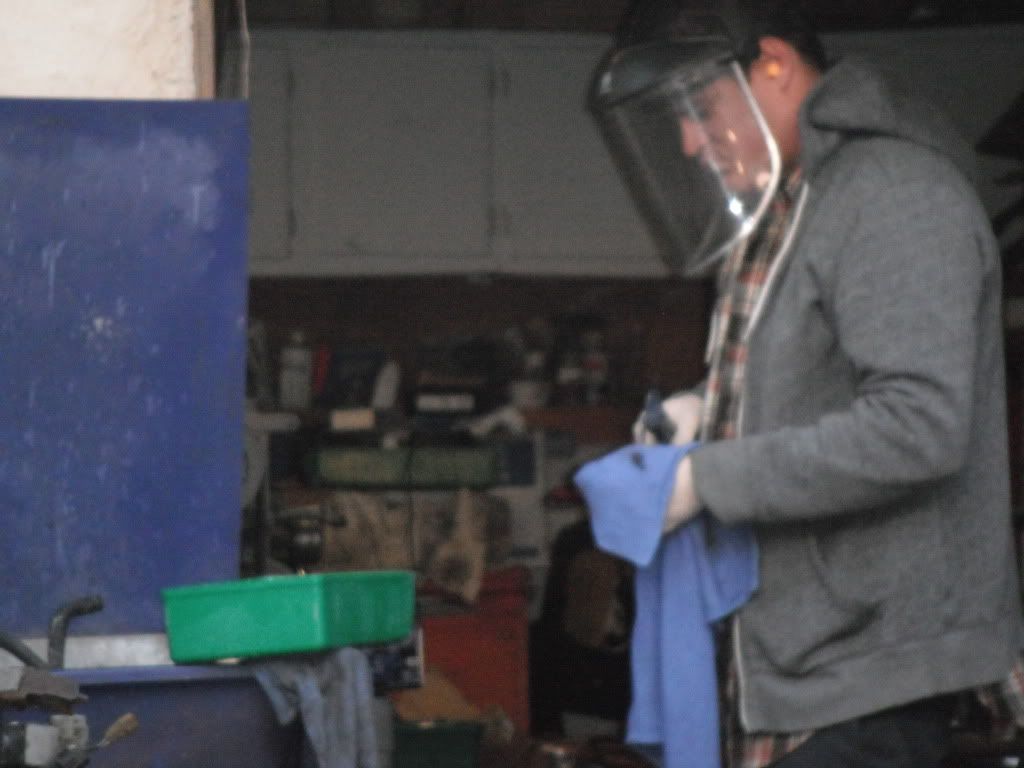 Image size reduced, original size: 1024 x 768. Click here to view the image in its original dimension. tomorrow assembly should begin  |
Proud Contributor of Initial D World Forums |
| HorizontalMitsubishi | Posted: Mar 19 2011, 11:01 AM |
Part of the Tessou Signature Series Group: Advanced Members Posts: 2,439 Member No.: 2,022 Joined: Jun 16th 2004 Location: Torrance California | We need to get gonz over to Burbank plating and get a load of bolts zinc plated, once you go zinc you never go back |
|
| DALAZ_68 | Posted: Mar 19 2011, 12:32 PM |
][0 I M ][o -O- Meter Group: Advanced Members Posts: 6,860 Member No.: 8,512 Joined: Jun 24th 2005 Location: California | and delay longer...no...lol |
Proud Contributor of Initial D World Forums |
| DALAZ_68 | Posted: Apr 24 2011, 09:34 PM |
][0 I M ][o -O- Meter Group: Advanced Members Posts: 6,860 Member No.: 8,512 Joined: Jun 24th 2005 Location: California | finally time to put this thing together has started went over to Luis's and heres the current progress... bare block decked. tanked, and repainted to make it pretty 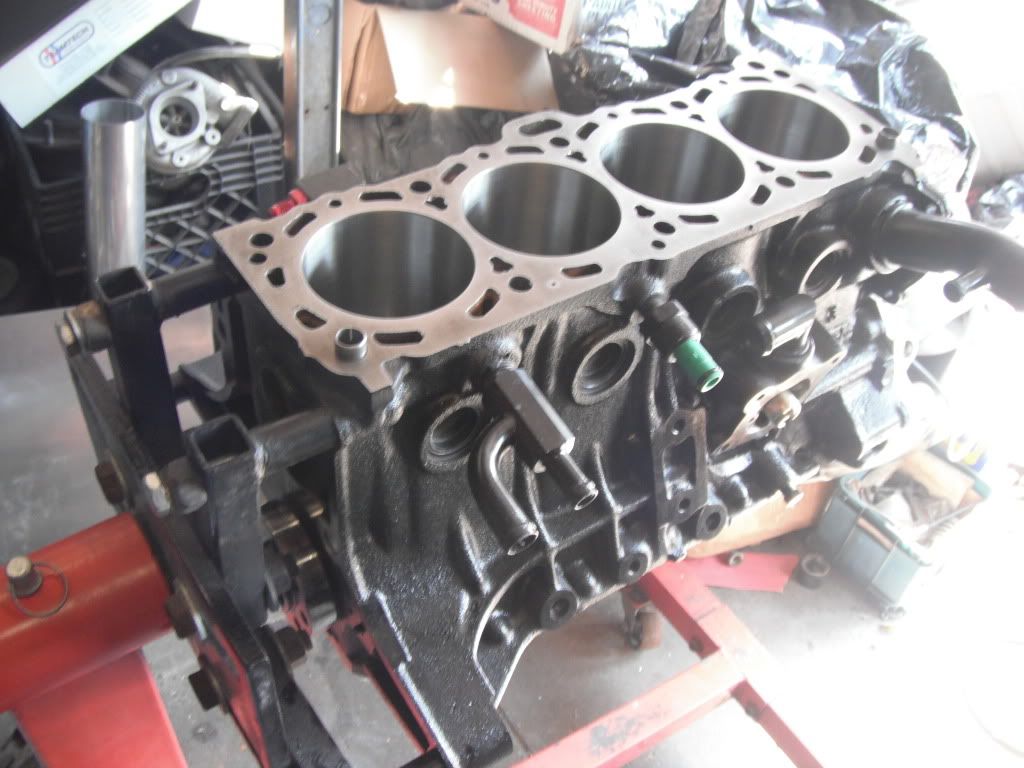 Image size reduced, original size: 1024 x 768. Click here to view the image in its original dimension. another sweet tidbit that i recently learned is that the OEM pump was redesigned not to long ago, the fact that my old one worked great and now this new and improved model is on, reliability is expected 100% 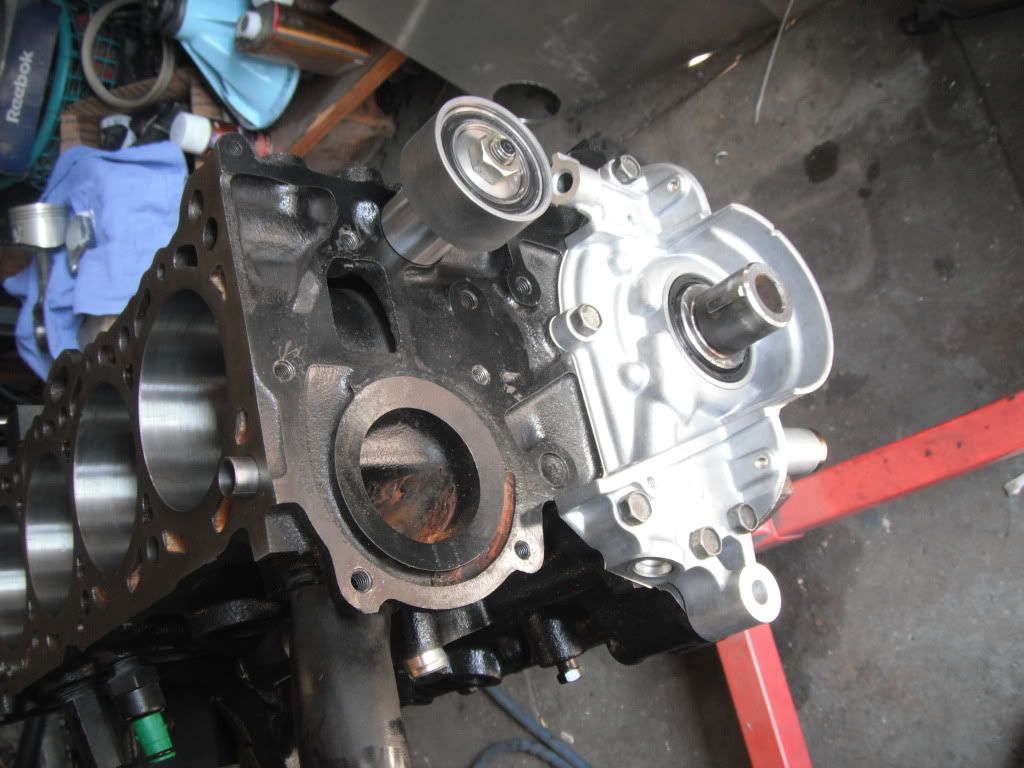 Image size reduced, original size: 1024 x 768. Click here to view the image in its original dimension. Pistons were cleaned and completely degunked,  Image size reduced, original size: 1024 x 768. Click here to view the image in its original dimension. prepping the block for the piston install and new ARP rod bolts and new bearings being installed... 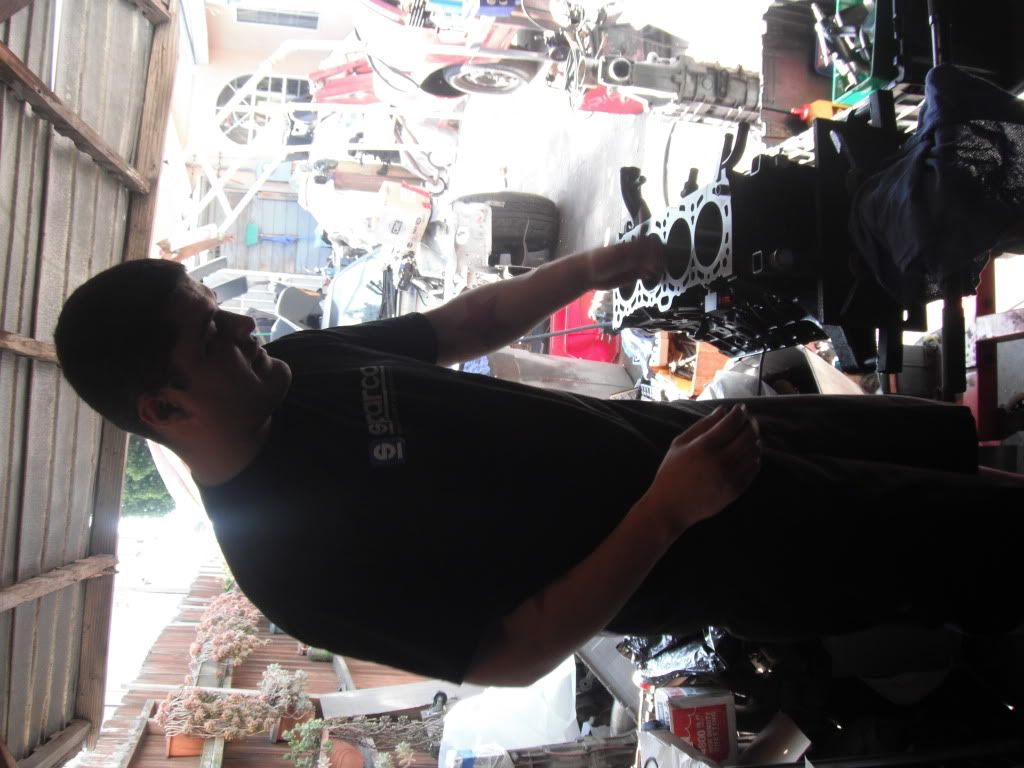 Image size reduced, original size: 1024 x 768. Click here to view the image in its original dimension.  Image size reduced, original size: 1024 x 768. Click here to view the image in its original dimension. install began 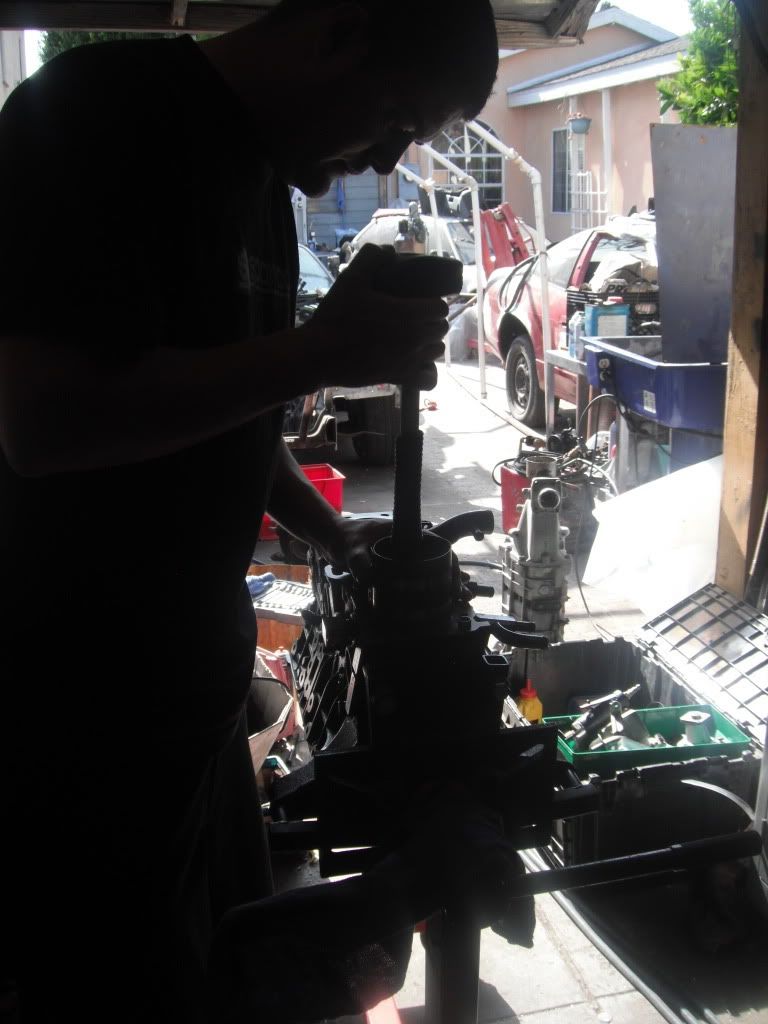 Image size reduced, original size: 768 x 1024. Click here to view the image in its original dimension. pistons installed and torqued down ready to go 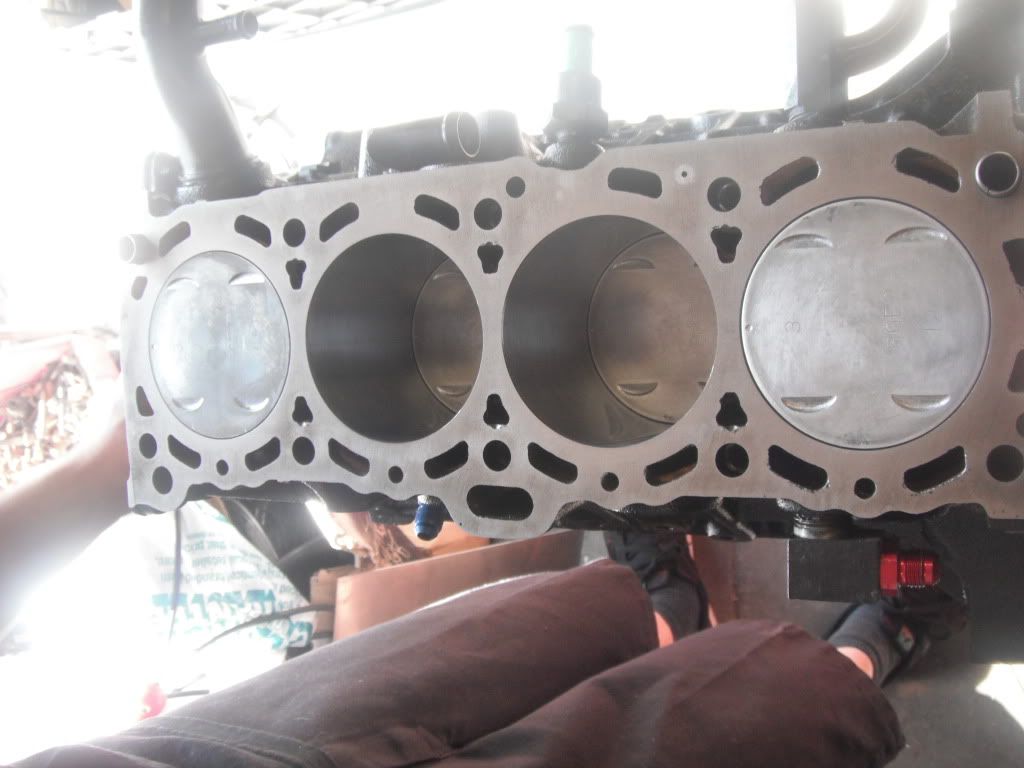 Image size reduced, original size: 1024 x 768. Click here to view the image in its original dimension. all installed and done...hurray! head bolts installed 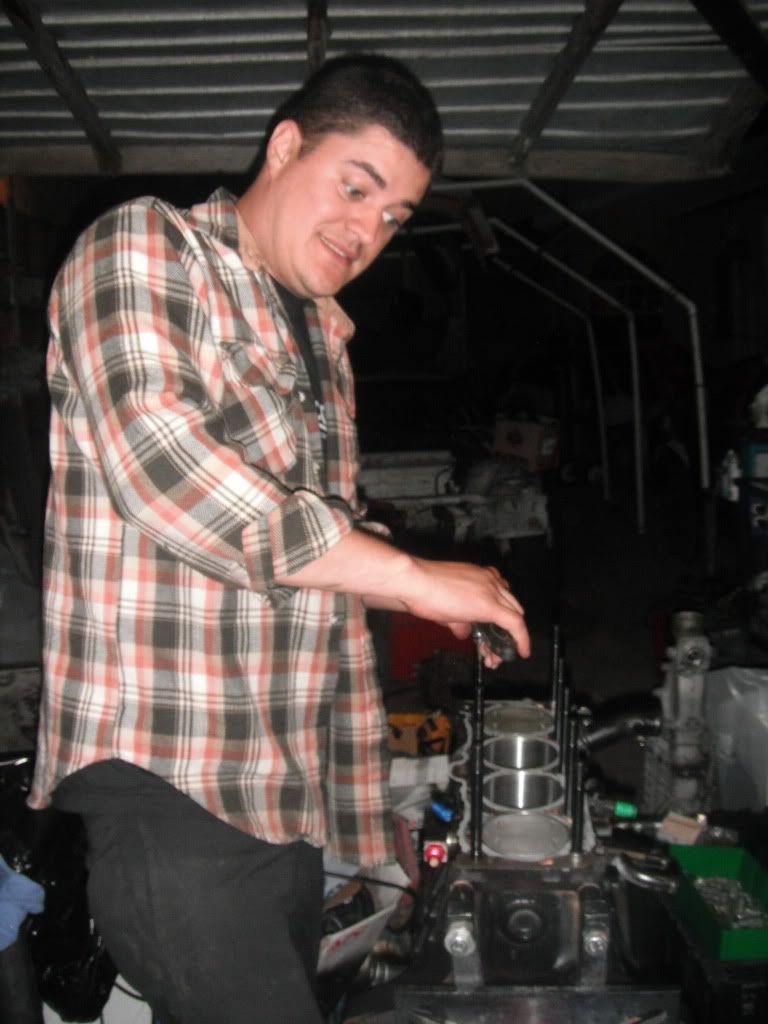 Image size reduced, original size: 768 x 1024. Click here to view the image in its original dimension. oil pick up reinstalled and everything below ready for oil pan 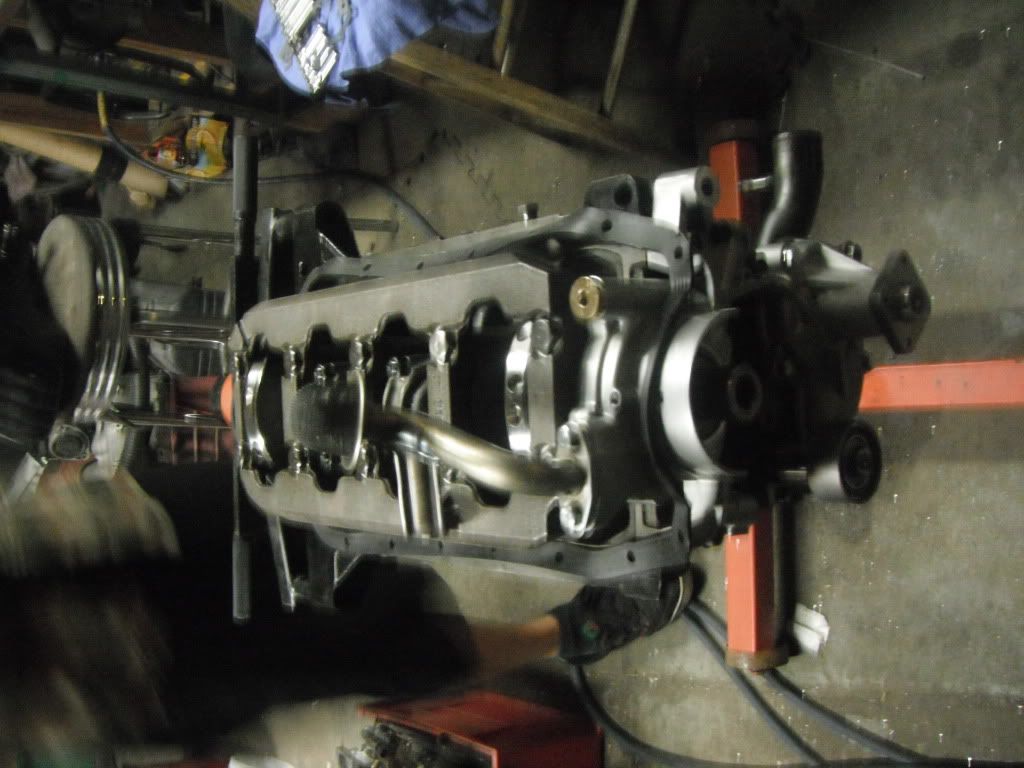 Image size reduced, original size: 1024 x 768. Click here to view the image in its original dimension. new rear main seal installed 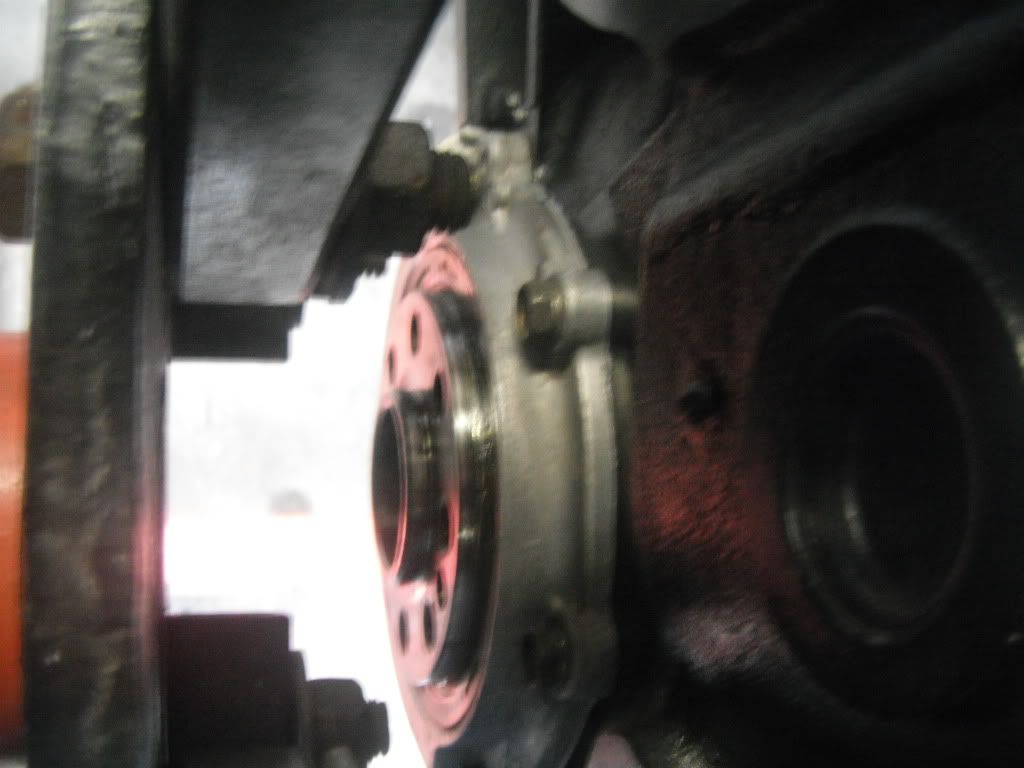 Image size reduced, original size: 1024 x 768. Click here to view the image in its original dimension. head reassembled and ready for install 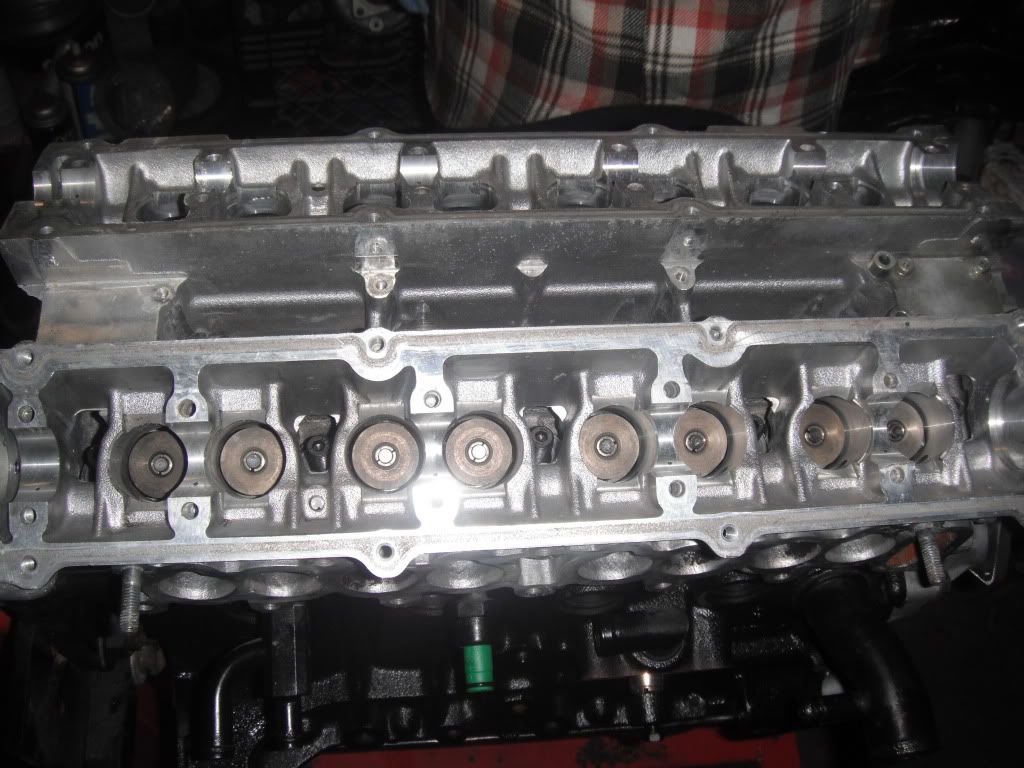 Image size reduced, original size: 1024 x 768. Click here to view the image in its original dimension. oil pan was scrubbed and degreased ready for install 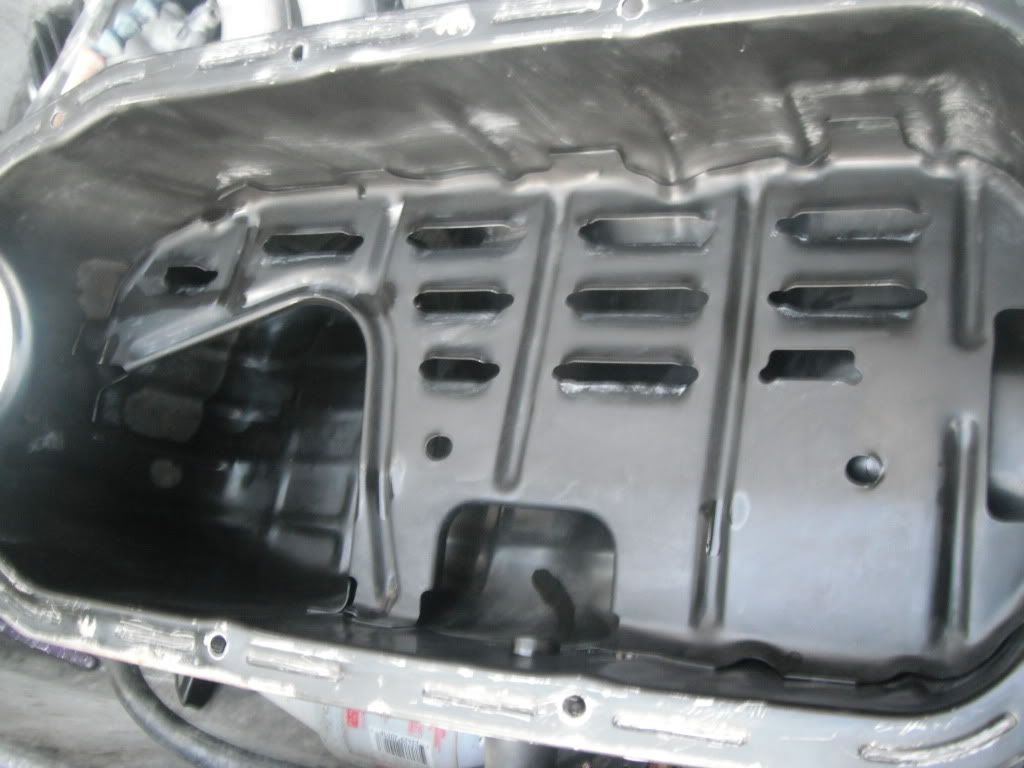 Image size reduced, original size: 1024 x 768. Click here to view the image in its original dimension. finally head installed, new water pump, idler pulley all and all a great night and great progress 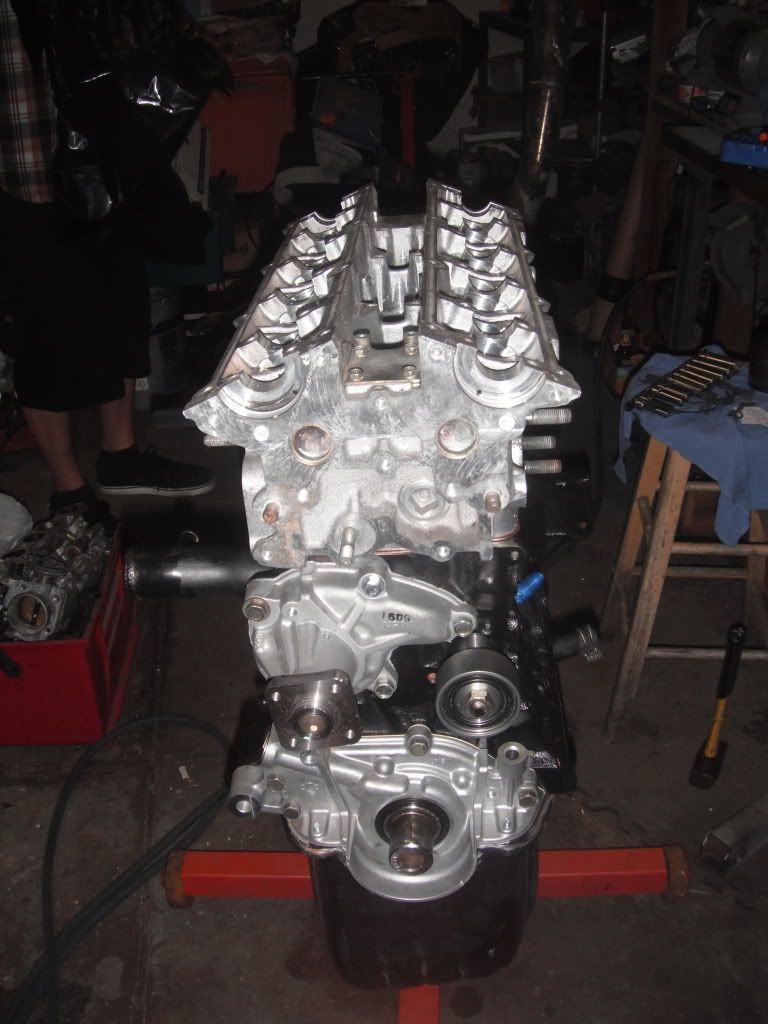 Image size reduced, original size: 768 x 1024. Click here to view the image in its original dimension. more to come hopefully friday... |
Proud Contributor of Initial D World Forums |
| JEV | Posted: Apr 27 2011, 11:31 AM |
IDW God Member Group: Members Posts: 175 Member No.: 30,661 Joined: Sep 19th 2008 Location: Mt. Desto | i love the look of a bare engine block How are the measurements coming? |
|
| DALAZ_68 | Posted: Apr 27 2011, 08:59 PM | ||
][0 I M ][o -O- Meter Group: Advanced Members Posts: 6,860 Member No.: 8,512 Joined: Jun 24th 2005 Location: California |
what measurements ?  | ||
Proud Contributor of Initial D World Forums |
| HorizontalMitsubishi | Posted: Apr 27 2011, 09:06 PM |
Part of the Tessou Signature Series Group: Advanced Members Posts: 2,439 Member No.: 2,022 Joined: Jun 16th 2004 Location: Torrance California | Leave the blue printing to the small block Chevy guys that need it. |
|
| DALAZ_68 | Posted: Apr 27 2011, 09:52 PM |
][0 I M ][o -O- Meter Group: Advanced Members Posts: 6,860 Member No.: 8,512 Joined: Jun 24th 2005 Location: California | now i is lost...  |
Proud Contributor of Initial D World Forums |
| Sensation! | Posted: Apr 27 2011, 10:20 PM | ||
As expected of country grown vegetables Group: Special Snowflake Posts: 2,330 Member No.: 19,520 Joined: Aug 14th 2006 Location: Redondo Beach, CA. |
aww  so you're saying i don't have to install my camshafts 3 times over to ensure a working motor on my 4 banger? LOL | ||
|
| Spaz | Posted: Apr 28 2011, 12:25 AM | ||
Just a guy towing a car across the country to chase a dream. Group: FORUM MODERATOR Posts: 9,272 Member No.: 30,193 Joined: Jul 25th 2008 Location: Plymouth, MN |
Evo X guys do, the 4B11s use shims over the valves. But realistically you're only bolting them in twice, first one to measure clearance with a feeler gauge, you do the math, order the right shims, then throw it all together. | ||
Proud Contributor of Initial D World Forums |
| Sensation! | Posted: Apr 28 2011, 06:59 AM |
As expected of country grown vegetables Group: Special Snowflake Posts: 2,330 Member No.: 19,520 Joined: Aug 14th 2006 Location: Redondo Beach, CA. | not as bad as what i was told to do for assembling that chevy 350. I do recall having to install that camshaft about 3 times. first for a test fit and feeler gauge, then take apart, regrease, place it back in and do the paper print thing, then take apart, check if the paper stamped on, and only then can you reinstall and be finished with it. |
|
| JEV | Posted: Apr 29 2011, 07:49 PM | ||
IDW God Member Group: Members Posts: 175 Member No.: 30,661 Joined: Sep 19th 2008 Location: Mt. Desto |
...Dam, i might have caused you to panic now. , it's just basic measurements of the gaps of piston ring end gaps and the journals gaps for oil...Or somethingUsing a plasti-gauge, to make sure that specifications are within OEM specs. *note what I'm about to say may be Complete BS* You pretty much place one of the green strips on the journal with the bearing? already in place. you then torque the cap on with torque specs. then you just remove it and compare the width of the now squashed green piece with the paper that you get. If the width is within specifications your okay on that journal. You repeat this with all journals. This affects oil thickness/pressure, if they're not within specs I'm sure the engine either will get damaged or won't run as should. If the piston ring end gap ain't right I'm sure the cylinder walls and rings will get damaged. If the valve train is adjustable, like Shims or just by a nut. you need to check those too. My teacher told us about a guy who either didn't do that or didn't put enough assembly lube on the camshaft lobes and within 20 or 30 secs, he pretty much grinded the lobes round(think circle instead of oval/egg shaped). He brought the camshaft and lifters to class the next day to show us. But, if it's hydraulic lifters / roller camshaft you don't really have to worry about that part. I passed engine rebuilding but by luck, and I've already forgotten all i learned...so yeah take it as a grain of salt. EDIT: just to let you know i have 2 engine blocks outside that i pretty much killed...And i tried to take out the pistons and it wouldn't come out then i realized later on that... I forgot to cut the ridge with a ridge reamer so that's why it no come out and i probably already damage the ring lands since i pretty much tried to hammer it out...now you know. ( i suck!!!) This post has been edited by JEV on Apr 29 2011, 07:52 PM | ||
|
| DALAZ_68 | Posted: May 3 2011, 10:44 PM |
][0 I M ][o -O- Meter Group: Advanced Members Posts: 6,860 Member No.: 8,512 Joined: Jun 24th 2005 Location: California | like i said prior, my mech is in charge of all this...pretty sure he did everything right...  |
Proud Contributor of Initial D World Forums |
| DALAZ_68 | Posted: May 30 2011, 07:49 PM |
][0 I M ][o -O- Meter Group: Advanced Members Posts: 6,860 Member No.: 8,512 Joined: Jun 24th 2005 Location: California | slight update 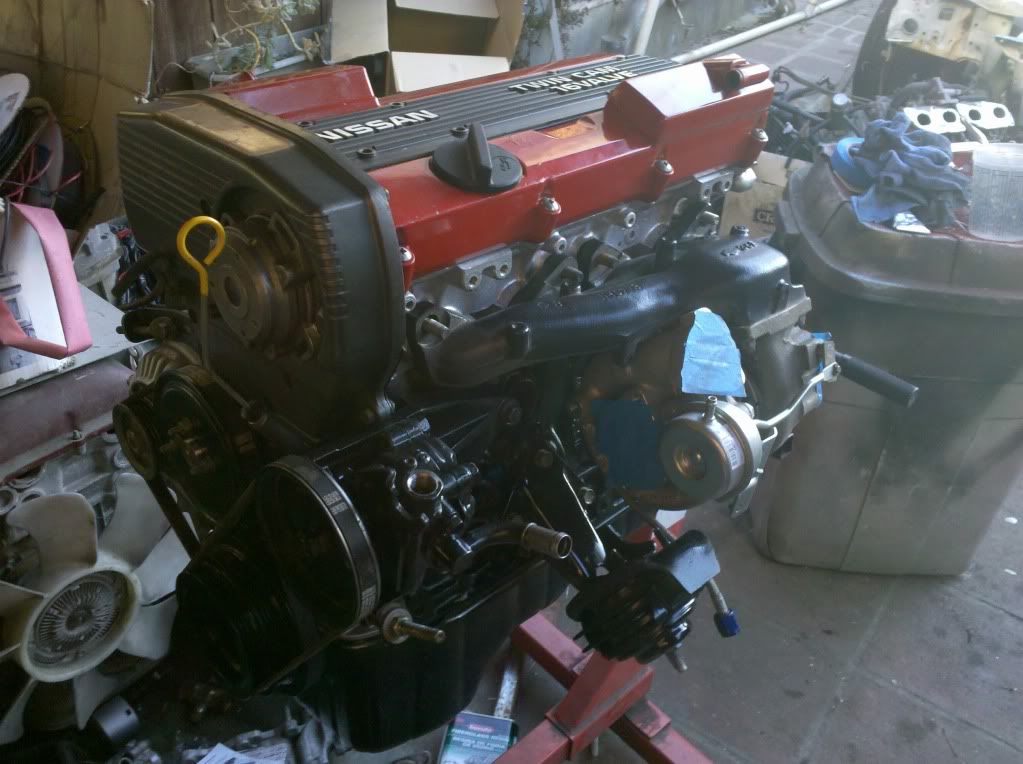 Image size reduced, original size: 1023 x 764. Click here to view the image in its original dimension. engine is assembled and timed, i just put the manifold on just to snap the shot...lol almost there... |
Proud Contributor of Initial D World Forums |
| Jardim | Posted: May 30 2011, 08:38 PM |
Willing to throw 5's on the blunt your smoking. Group: Advanced Members Posts: 2,659 Member No.: 15,519 Joined: Jan 21st 2006 Location: Hudson, MA | What cute little turbo am i looking at ovah theeah? |
|
| r3d$unz | Posted: May 30 2011, 08:42 PM |
GRRRR...YO! Apachai daio~!! Group: Advanced Members Posts: 3,369 Member No.: 1,533 Joined: Mar 28th 2004 Location: Update Profile | Off topic: Dude you lost a LOT of weight, props man! On topic: How far are you from completing your goal? |
Proud Contributor of Initial D World Forums |
| DALAZ_68 | Posted: May 30 2011, 08:57 PM | ||
][0 I M ][o -O- Meter Group: Advanced Members Posts: 6,860 Member No.: 8,512 Joined: Jun 24th 2005 Location: California |
how do you know? lol its almost there, had to get some new OEM oil pan gaskets cuz the Felpro was completely wrong, so OEM it is... and had to get the new rear engine plate cover since my swap didnt come with one... which finally came in from Japan after a month and half of waiting...so it should go in soon...hopefurry... Jardim - its all i need for my goals This post has been edited by DALAZ_68 on May 30 2011, 09:00 PM | ||
Proud Contributor of Initial D World Forums |
| Jardim | Posted: May 30 2011, 09:27 PM |
Willing to throw 5's on the blunt your smoking. Group: Advanced Members Posts: 2,659 Member No.: 15,519 Joined: Jan 21st 2006 Location: Hudson, MA | Oh, not judging man, but what kind of turbo is it? it looks fairly new |
|
| DALAZ_68 | Posted: May 30 2011, 10:13 PM | ||
][0 I M ][o -O- Meter Group: Advanced Members Posts: 6,860 Member No.: 8,512 Joined: Jun 24th 2005 Location: California |
its and S15 T28 Brand new out of box... | ||
Proud Contributor of Initial D World Forums |
| Jardim | Posted: May 30 2011, 11:28 PM |
Willing to throw 5's on the blunt your smoking. Group: Advanced Members Posts: 2,659 Member No.: 15,519 Joined: Jan 21st 2006 Location: Hudson, MA | Not bad turbo at all, still practical for daily driving and track use. |
|
| DALAZ_68 | Posted: May 31 2011, 09:20 AM | ||
][0 I M ][o -O- Meter Group: Advanced Members Posts: 6,860 Member No.: 8,512 Joined: Jun 24th 2005 Location: California |
car is only gonna be used for track...no worrying about cops etc... | ||
Proud Contributor of Initial D World Forums |
| HorizontalMitsubishi | Posted: May 31 2011, 06:56 PM |
Part of the Tessou Signature Series Group: Advanced Members Posts: 2,439 Member No.: 2,022 Joined: Jun 16th 2004 Location: Torrance California | register it in a smog exempt county, no need to worry about the cops |
|
| 29 Pages | |
Powered by Invision Power Board 1.3.1 Final © 2003 IPS, Inc.